Some quick input on the highlights in Woodooz in 2015 before we get into the vacation mode :
And before we leave you with some insights on our short vacation,

allow us to wish you a happy, wonderful and a prosperous 2016.

Exploring South Goa

The moment one mentions travelling to Goa, the immediate thought that comes to everyone’s minds is the happening beaches. I would defer and say Goa is much more than just beaches and parties. The true beauty of Goa lies in its exclusive architecture. While I think we made good use of our two days in South Goa, here's a little something about the few places we visited.

On our way from the airport to the resort, I had a feeling we were driving on one of those roads in Kerala or Sri Lanka- Coconut trees on either sides of the road, thatched roof houses, greenery, the churches, birds and the flowers… We decided to spend less time at the beach and explore the historically prominent places in the city. Just to give a gist of the Goan history- Goa has played an influential role in the Indian history as it was one of the major trade centers in India. Due to the Portuguese rule from the 15’th century until almost mid 19’th century, the Goan architecture has heavy Portuguese influence. It also has flavors of Hindu and Muslim architecture given the fact that it was ruled by Hindu and Mughal emperors at different points in time in Indian history.

The Shanta Durga and Mangueshi temples have a fusion of Indo- Portuguese architecture. Both the temples feature pyramid shaped dome rising on the roofs of the entrance hall and the ‘sabhamandap’ or the main hall. This, I believe would have been due to the Mughal touch.


 The temples have a ‘tulasi madam’ in the courtyard, a lamp tower/ ‘deepa stambha’ and a water tank/ ‘theppakkulam’ that are typical of a Hindu architecture. 


The temples have high ceiling, curvilinear roofs that are very Portuguese, several pilasters and balustrades, Roman- arched windows with stained- glass window panes of red, yellow, blue, green colors.


While we were still awed by the elegance of these temples, we were taken to the Basilica of Bom Jesus church, a UNESCO world heritage site in Old Goa. The building is an architectural finesse. It is considered to be one of the best examples of Baroque/ Italian architecture in India.

The church is made of laterite and the front wall is molded with basalt casing giving it an impressive rustic look. The interiors have marble flooring, beautifully gilded altars with inlay work. On the Southern side is a chapel that has floral decoration in wood, where the mortal remains of St. Francis Xavier are kept.


 This is probably just 20% of what is actually there in Old Goa. We wanted to visit the city market, couple of beaches, and a fort. But we ran short of time. We are definitely going back to explore rest of it.  While DIY has been the focus here, we are also getting lured into ancient architecture, design and décor in that is for now the by product of all that we are doing here. So do expect sprouts of these posts amid our DIYs too.  Please do pour in your thoughts, suggestions on potential places to explore, interesting designs etc.


Note : Please check our Staining wood series also which uses a different staining method from what is explained in this post.

Adding color to wood is like the icing in the cake. You mess it up, and all the efforts taken to bake the cake goes waste. And so it becomes one of the most critical part of completing a project is to make sure you give it the desired color. While there are many methods used in giving color to wood, and we have also seen a few in Woodooz, one of the common methods is to use wood stains.  

When I started looking for means to stain my first ever project, I was clueless. And it was a professional carpenter who taught me how to use sealant and stain.We have already seen in detail the procedure for applying stains using sanding sealers as base coat. Another variant which I was taught by another carpenter was using wood fillers and stains to give that much needed color to wood. I made a short video to explain the process. I hope you find it useful. 

Staining requires surface preparation by way of sanding and smoothening the wooden surface. I am also posting the sanding basics video which would even otherwise be useful for folks looking at making smaller projects. Remember to leave a comment and let me know what you think.


Click here
Subscribe to my videos in YouTube
I am working on more video tutorials and you can expect to see more of these in the coming days. Meanwhile, it would be great if you can subscribe to TheWoodooz Youtube Channel. Until next time, Happy Woodworking :)


Sincere apologies for not getting back on how our living room make over is progressing (Read about the BEFORE and AFTER-PART 1 posts before you proceed). Our daughter has kept us on our toes and we are busy baby proofing every single item in the house. From the time we published our earlier post, we have added a few things to give our living room the traditional South Indian feel.

A wooden trunk, restored from an antique wooden trunk- We got this shipped from an antique dealer in Kottayam, Kerala. Thanks to a friend, a native of Kottayam for giving us his contact (for those interested in knowing about this seller, please email us). 


Rosewood trunk
Antique Rose wood trunk
Apparently in the olden days, wooden trunks were used by ‘chettiars’ as a dowry chest and is gifted to the bride during her wedding. It is normally made using rosewood or Burma teak to showcase the extravaganza. This one is made of rose wood and has brass pieces embedded on it to further adorn it. It fits in nicely as a side table in my living room. I added some brass pots (called ‘padi’ in Tamizh and was used to measure grains in the olden days) on them. My ever favorite Buddha piece rests nicely on it (Now don’t ask me how Buddha adds to the Kerala/ Chettinad interiors). I just love the serenity it brings to our home. A Kerala mural is also in progress and I will post the pictures of it once it is complete.

Buddha
The serene Buddha
We also added wooden wall brackets to hang our peacock diya. The wall brackets are made of teak wood and I got it from Kraftome in Coimbatore. They were reasonably priced and of good quality. They may be a bit small to be hung near the roof. But I am ok with the current look until I find bigger ones for a reasonable price. The peacock hanging diya is made of brass and was purchased online. I gave it an antique polish to give it the desired feel.

Note : Could not capture the photo of the brackets as we could not get a good composition at that height.

Peacock
Peacock Diya
Wooden bracket
Diya hanging from the wooden brackets
Finally we fixed a Ganesha brass door knocker. It serves two purpose. One, it forces our guests to use the knocker instead of the bell (with a baby around, a door knocker is better than a loud gong). Two, I think it adds a native touch to our entrance door.

Brass door knocker
Ganesh door knocker
Door knocker - Lord Ganesh
Door knocker - Lord Ganesh protecting the home
We are taking things slow. I am exploring laying athangudi tiles as the border for our floor. We will update about it in the next post. 

Please let us know what you think of the progress.

~ Preethi


Don’t we all love to personalize our living spaces with our signature tastes, and distinctive panache. Some may want to reproduce the prevalent schemes back home in their native (Like the Kerala or Chettinad style). Some may want the décor to be a reflection of their personality (Through colors that represent a certain persona). Some may even employ professional designers to do up their house to their liking. Everyone has their own means of customizing their house. We do it with our DIY and we draw inspiration from exclusive sources like Homify. So much so that we sometimes get asked, “Where did you buy that”, only to be told that we made it, or “Wow ! Did you make it”, only to be told it was bought from somewhere. Either way, it adds that personal touch to our humble abode.

It is time to up our ante and look at things beyond the small items that we have been building here. Time to look at what can get into our DIY checklist to help us add more functionality and glamour to our already DIYed home. And here’s what we came out with.

The best bunk bed in the world

The toddler now sleeps with us. But then when she transitions to having her own room, we want to gift her the best bunk bed in the world. And how? By building it ourselves. Even better, get her involved and have her choose what she wants for her own little world. 

KIDS TREEHOUSE BEDROOM BUNKBED in White : Industrial Wardrobes and drawers by Cuckooland
Pic Courtesy : Cuckooland / Homify

Big, bold and beautiful

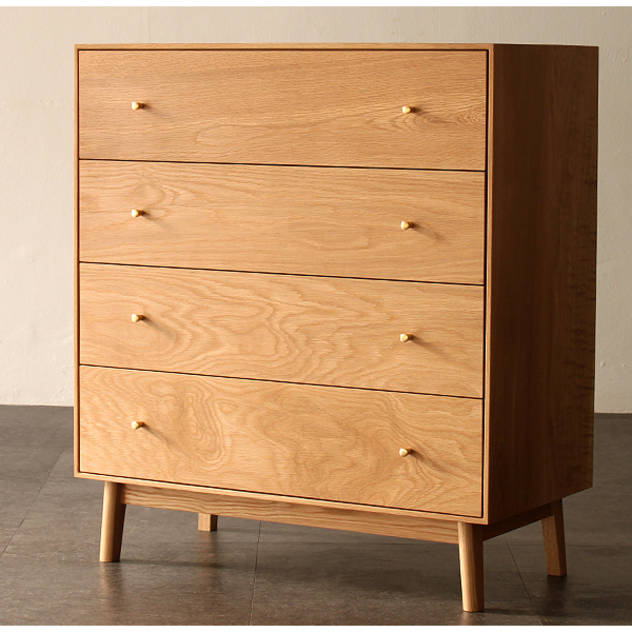
We live in a small 2 bedroom home and every passing day is adding to our need to increase storage space. There are corners around the home that can accommodate additional storage. But hey ! We don’t want any wardrobe, we want our own handmade chest of drawers. Big, bold and beautiful.

Industrial Wardrobes; drawers by GRAINOD
Pic Courtesy : Grainod / Homify

Mini home office

Preethi works from home and I intend to exercise my WFH option on and off. And to be able to cut ourselves off from all the distractions, a dedicated home office space is something we long for, with a small modular work desk that can be folded against the wall when not in use. And yay ! We want to DIY it.

KEFIR HOME : Minimalist study/office by IK-architects
Pic Courtesy : IK-Architects / Homify

Sharp edges to rounded corners

And this one is just to satisfy my ego. If you have been reading this blog for a while, you would know about my love for making square / rectangular shaped lampshades. But then, one day I want to figure out how I can make a wooden frame for a drum shaped DIY lampshade. 

Swallow Lampshade in Purple : Industrial Wardrobes; drawers by Lomas
Pic Courtesy : Lomas & Lomas / Homify
These are mere inspirations that have translated into checklists. It is now up to us to find a way to upgrade our skills and tools to be able to execute them one by one. We have the need. We just want to find the time and the will to do it. Whether it turns out good or otherwise, it will remain personal and special which by now has become our signature style.  Now what do you think ? Doable ? Difficult ? Impossible ? Do share your inspiration story with us and let us know HOW YOU LIKE TO PERSONALIZE YOUR SPACE !

P.S. This is a sponsored post. The opinions expressed however are my own


Last week, we had two major events in Woodooz:
  1. We announced the starting of the DIY Woodworking group on Facebook. Interestingly, we received good response and we are getting to consolidate the group with woodworking enthusiasts and aspirants. Already, there are useful threads around how to prepare chalk putty, and what should be the essential tools in a beginner's list. I strongly urge you to join as I foresee interesting DIY shares from folks around the world.
  2. We had our first DIY woodworking tip published in the honorable Hindu Melange Metroplus Edition (17th Oct, 2015). I chose a small, beginner level project that can be made around Navratri / Diwali when we have guests coming home. A DIY tray can carry a good show-off value as you can show it around casually and subtley without trumpeting about your new found hobby. This week, I wanted to elaborate on the project - The basic serving tray you can make.
Basic level carpentry
Easy Diwali DIY - Basic woodworking project
The step by step procedure is already in the published content (Check image below), and so I want to focus on the photos (Published and unpublished) that by themselves explain the procedure. Do take a look and let me know if this is something that you would love to make sometime.
Click here to enlarge image
Hindu Melange Metroplus - 17th Oct, 2015
Used simple materials like plywood reapers, OST / Plywood sheet for this project. Made it easier as no power tools are required. Just a hacksaw blade did all the trick for me.

Materials - tools required
Plywood reapers, OST / Plywood, hacksaw blade, wood adhessive
The size of the tray is based on your requirement. Mine is a square tray and it is 12 inches on all sides. You can make a smaller, bigger or even a rectangle tray - Just customize the size to you needs.

Tray frame
Cut using hacksaw blade
6mm plywood or a 4mm OST sheet (One Side Teak) - Both would serve the purpose. Just walk into a plywood store and ask them if they will be able to spare a sheet that was cut from a bigger sheet. Such sheets normally never sell and the vendors would be happy to give it to you for a small cost.

Tray base cut to fit the frame
Glue on both surface

Apart from the glue, you can use small headless nails to secure the base to the frame. For making sure the glue bond is strong, use masking tape, clamps or just overturn the tray and place something heavy to hold the base and the frame. I use a vessel filled with water if I cannot find my tape.

Masking tape on tray
Masking tape or heavy weight. Both can help to hold the surfaces together
After the base and the frame have bonded well, I used hammered in headless nails (Optional). This is your basic tray. You can even use it without a handle. However, you need to apply the required finish for the tray to be functional. Remember, you are going to serve coffee and tea and you need means to handle the spill.

Serving tray tutorial
The tray - Before

Until now, whatever you see is my handiwork. I promptly handed over the tray to Preethi and left it to her to finish it up. I was awed by the outcome and I realized it is good to have an art expert at home. After all, art is not my forte.

Serving tray tutorial

The tray - After
I will detail the finishing process as a separate post as this one is already getting photo heavy. It will also help break down the process without having to stuff you with too much information in one go. 

As a parting note, I want to tell you this. Working with wood opens up options for you to make small functional items for your home. If you are hesitant, working on this DIY is an ideal first step to gain confidence. You can make your DIY a talking point among guests and items like your own tray can become conversation starters Now that Navaratri is over, try this out for Diwali. Go DIY and leave us your feedback as a comment.


Would it not be great to have a forum to share all your DIY projects ? Don’t you agree that a group of like- minded individuals getting together to exchange ideas, provide feedback, offer tips and discuss a particular niche is always a healthy way to grow the niche within that community and beyond? Would it not be great that you had someone, anyone to provide you the way forward when you are stuck in the middle of a project? Don’t you agree that having an open environment to have your DIY queries addressed by other enthusiasts can help enhance your interest and skills in the hobby? 

DIY Woodworking - India

From all the "Would it not be great" and "Don't you agree" questions stemmed the idea of creating a Facebook group - A group focused on DIY woodworking more specifically limited to Indian geography.  I created the DIY Woodworking – India group way back in 2013, but never got the opportunity to work on adding more interested members into it. With increasing number of folks taking up Woodworking as a hobby, I wanted to extend an invitation to all of you who are reading this to join the group.
Woodworking India group
A Facebook Group to share your woodworking outcomes and hone your skills
  • If you think DIY Woodworking is your forte, JOIN NOW
  • If you even have the faintest of interest in taking it up as a hobby, JOIN NOW
  • If you have completed a DIY project and you are looking at like-minded people to share it with, JOIN NOW
  • If you are in the middle of a project, and not sure how to proceed, JOIN NOW
I want to bring in relevant interested folks into the group to keep it focused. And that is why I want you to click join, because no one better than you would know if you are relevant to this group.  Once in, be sure to invite your friends and families who would love to come out of their comfort zones and try some bit of woodworking. And for you to understand more, here’s some FAQ on the group :

Some FAQs

Why a group when you have your Facebook page ?
To reiterate, the page is becoming more about me. A group makes it easier for others to join the fun. From one to one on a page, it becomes one to many and many to many which makes it more meaningful.

There are other woodworking forums, then why this?
I want to bring the Woodooz community together. In that sense, I feel this will be a more concentrated group and not a redundant one.

Why DIY Woodworking – India ?
There is enough information available about Woodworking elsewhere. Idea is to bring together folks who can help with local terms, tools, methods and jargons.

There are hardly any people in the group. Why join?
This is the first time am talking about this group, and I hope there would be more enthusiastic people joining in due course. Now, without thinking, you JOIN.

I see no conversation happening in the group. Why join?
We are laying the foundation. The dialogues would soon happen. Trust me.
So go ahead, join. Add your friends. Discuss. Ask. Take help. Learn. Share.


A professionally built modular kitchen. Equally good wardrobes, crockery shelf and TV units. Not much can go wrong right ? True. Because, even after 8 years, all the woodworking we had invested in was intact and functioning immaculately. But not that Sunday afternoon.

My Sunday Afternoons

My Sundays are quite the routine that I thoroughly enjoy. Particularly the afternoons. I get to eat my favorite vathakozhambu for lunch, watch a bit of whatever Tamil movie I can lay my hands on and then have a long siesta. Sometimes long enough to even miss the beautiful sunset from my balcony. It is a habit that I relish. Maybe I believed it helped me with the maddening week that lay ahead. Maybe it helped shake the dreadful blues of the Sunday evening (Worse than a Monday morning I say). May be. May be not. But I look forward to that movie and that naaaaaaap. So anything out of the way can really spoil the pleasure for me.

That afternoon Preethi was working on a painting project and she asked me to get her kit from the draw. I opened the draw to claim the palette, oil paints and the linseed oil. I handed over the art gear and shut the draw close. That's when it happened. As I closed it, the handle with the draw face fell down from the draw (Factory made and made by professionals) exposing 4 wicked nails. Since I was getting ready for my nap, I put the fallen piece of wood away to be dealt with later, only to be told, “There are sharp nails jutting out of the draw. You better fix it NOW”.
Related reading: Start your own woodworking hobby with this simple recipe
Be your own handyman
Can you see a smiling face with two wicked eyes ? :)

Anything can go wrong

Well, this is only one example. We have had the bed room door knobs not working. The balcony door stopper not being effective. Even the pulley type clothes hanger becoming completely unusable. Point is, anything can go wrong any time. Each of these small issues has its own merit in increasing the discomfort levels one way or the other. Based on the degree of inconvenience, they will need anywhere from immediate to gradual / delayed attention. That Sunday afternoon incident needed immediate attention because of the exposed nails that were kid unsafe.  

I have spoken about the intrinsic benefits of DIY woodworking many times and it wouldn’t hurt to reiterate it. How many times did you have to endlessly wait for a carpenter to come over and repair a problem? How many times did you have to throw a broken something and get a new replacement for it? Everything has a life and everything will show its true color after due wear and tear. There is nothing really as permanence and even durability wanes with time and use.

Moral of the story

My Sunday afternoon could be yours someday. You will have a pressing need to immediately patch up / refurbish a defective / broken something.   And when that someday comes, why wait for that elusive carpenter.Be your own handyman. Learn to fix it yourself. And yeah, you will not repent it.

Indian Woodworking - DIY
The supposedly permanent fix - I used extra screws 
  • P.S.1 : I ended up watching a Danush movie that afternoon. 
  • P.S.2 : I had the audacity to ignore the "FIX IT NOW!" command and went ahead with my zzzzzing. We managed with an interim solution for couple of days before I provided it with the non-existent permanent fix.


It took me more than 8 months to make the display case project. Not just because of other things that kept me busy, but also because of my own faults. I still remember how many times I changed the plan either because I did not like the output, or because I did not have the required tools, or plainly because I had messed it up. Most of this tremendously increased my trips to the plywood store. Something as simple as buying a white sheet of laminate only to come back home and realize I have been using oft-white all along. Some of these mistakes added to cost, and the rest of it added to the time and effort involved. By the end of it, all I could muster was a heavy sigh of relief. 

So here I am documenting the lessons from this project just so I keep coming back to this before I start all my newer projects.
Before and after - Plywood to functional shelf
Before and after - Display unit built entirely with plywood

Working with laminates

  • I should have decided to use a laminate for the outer surface of the shelf. I first decided to stain directly on the plywood. Somehow it did not appeal to me, and so I decided to add a layer of OST and then stain. Somehow, that did not seem appealing and I finally ended up using a laminate.  Effect : Loads of wasted time and effort. I could have saved more than 10 days had I decided to directly go with laminate on plywood top.
Staining
Wrong choice of finishing resulting in waste of time and effort
  • I should have decided to use a laminate for the insides of the shelf. I first attempted priming the base and then applying white paint. Total failure. Then I shifted to multiple layers of Gesso and white acrylic paint. Effect : Awesome outcome despite the wasted time and effort.  But then when I started applying varnish, the whole output collapsed. Finally, went with oft-white laminate which worked in my favor. I could have easily spent about 15-20 days adding layers and layers of primer and waiting for it to dry.
  • I should have stuck the oft-laminate first before fixing the sides of the shelf. The shelf was built and then the laminate was stuck. The first time I tried to stick the laminate to the inside back of the shelf, the measurement was slightly off track and when I tried to remove the laminate, it cracked. AIYO !
Laminate on wood
Laminates can crack easily. I learnt it the difficult way
  • I should have known what laminate I was using. Despite the plywood vendor telling me that I bought only oft-white the previous day, I insisted he give me white laminate as a replacement to the broken one. I came home and realized he was right. PHEW !
Finally the wooden shelf was built to my satisfaction and it was now time to fix the glass shelf and the glass doors. YAY !

Working with glass

  • I should have known that the glass door will rub with the glass shelf if the shelf depth was not correct. Much to my dismay, I noticed it after all the installment was done. I had to take the glass sheet to the store to cut the edges off to ensure smooth opening and closing of the door. URGH !
  • I should have known the glass is fragile and is likely to break when something falls on it.I was installing the door and the hinge on top slipped and fell on the shelf chipping a piece of it. Another visit to the store to shorten the depth to remove the crack. WHEW !
Chipped glass
Chipped off glass and the rounded corner - Something to think of next time

Working with LEDs

  • Finally, I bought a good looking LED focus light for the shelf. I should have known that I did not have the tools to drill a hole that big and that the drill bit was very expensive. I decided to tone down the size of the focus light (now a single LED), just so I can complete the task. Major BULB !
    Install fOcus lights
    Working with LED lights - Choose those for which you have the tools

In a nutshell - Plan, plan and plan

If you re-look at each of the points all of it point towards lack of planning which was a result of either lack of knowledge or blatant oversight from my side. While the lapses did add to cost, they have also given me a better understanding of the aspects to take care of in the future. Have to plan so that no time, material, effort or money is wasted. I am sure I will still get some of the things wrong the next time too, but with experience I will reduce the number of these mistakes. And the goal is to eventually master the art of planning before commencing projects. This post is a reminder that I should consciously work towards that. Do wish me luck and let me know if you have had your own time / effort wasting tactics in doing a project.


We bought a DSLR camera back in 2014 to capture better pictures of our DIYs. And when I was working on this particular project, I started taking  a step by step video of the procedure involved. All heavy duty video files. Maybe about 90 minutes of content which was to be edited later. But this was just before we went on a vacation… to a destination with possibly the most romantic symbol ever - Agra. As I stood there in front of the Taj Mahal, trying to get the best angle to capture its beauty, my camera displayed a very very disturbing warning message - “MEMORY FULL”.  8GB and all consumed by my video files.

Down and dejected, I had to choose between what Shah Jahan built and what I was building. With a heavy heart, I chose the former and deleted one file. After about 2 hours, another file disappeared. At the Agra fort, few more went kaput. And by the time we reached Fatehpur Sikri, almost all the files had to be deleted.  This was in Jan 2015, and I was glad I came back with loads of memories, until today when I sat down to write this post. 

Taj Mahal
The Taj Mahal

The Requirement

My cousin wanted me to make a display case to showcase some (there is lots of them, but he gave me a select few) of the honors and awards his father (My Periappa) had garnered over his very illustrious academic career. He gave me four framed felicitation certificates that he wanted to exhibit in the living room. I took the measurements, came back home and started the project on January 4. And delivered it yesterday after working on it for a short span of 8 months. That should speak a lot about my speed.

DIY project - intermediate level
DIY Display Case

Showcase
Show Case

The Design

There was not much in the design. Just a box, with a glass shelf, glass doors, and a focus light. I had to match the color of the shelf with the existing furniture shades and after so many trial and error, decided to go with laminate. The background needed to be white, and used laminates for that too. What took me lot of time was the laminates. The learnings from this project is a post by itself and I shall talk about it sometime soon.

DIY Shelf
With all the awards and honors

The Challenge

The focus light was a challenge. I bought a nice big light, and realized the drill bit to cut the required hole costed a bomb. And so I toned it down a bit and went for a small light with just one LED. I used stain for the edges and then covered it up with Mod Podge. The entire project was built with 19mm plywood, and 5 mm glass and so it ended up being pretty heavy.

Cabinet light
LED Focus light

That satisfying feeling

Yesterday was the delivery. And it was such a pleasure to see my uncle get so excited about the display shelf project. All his accolades came out from inside rooms and went into the display case. In his late 80s now, it is amazing how much he wanted to understand the details of how the shelf was built. And I cannot explain how generous he was in appreciating the effort. I walked out mighty happy. Moments like these make my day and make Woodooz a really worthwhile effort.

DIY showcase unit
Do it yourself project

With whatever pictures and videos I could save, I shall put up a step by step procedure soon. I also wanted to share some learnings, that had I known, could have saved me days of wasted time. And sometime later, I will also do a video tutorial on how to install a under the cabinet light. Until then, let me know what you think of this display case. Would love to know all your thoughts.


I have always worked independently on all my projects. Of course, Preethi lends a helping hand, and that’s that. For once, I had a request from my very friendly neighbor(s) if I could help her with a wall clock. Surprisingly, it was the power of Google and my Wall Clock DIY tutorial that led them to me despite meeting and chatting up on a regular basis for the last 6 odd years. And I happily took up the opportunity.

A little background about Varsha. She is a fine arts student and needed to do this as part of one of her final year projects. To make a painting was the need, and the choice of the base was left to the students. She chose to showcase her painting on a clock. 

Do it yourself wall clocl
Beautiful hand painted DIY Wall Clock - By Varsha Sowmyanarayan
My role was to help her make the clock and so we started the project one Sunday evening. I chose to make it with wooden sticks for the frame and OST for the base much like all my other clock projects. It took us less than about couple of hours to get the clock base done. Most of these two hours were spent in waiting for the glue to dry. Once done, it was all left to Varsha to splash it with her creativity. The clock went with her to her home and so Preethi and I were left to wonder what the outcome was going to be like. We had no clue whatsoever, and so that added to the excitement. We didn’t have to wait for more than a day to see what she had done with the clock.

Wooden sticks and OST
Clock base using OST and wooden sticks

Rear of clock
Wall Clock rear side

These pictures were shared with me later. We only got to see the final product and trust me, we were so excited. My clocks mostly had printed images or wooden stain, and so you can understand the delight to see a wonderful painting.  Part of the excitement was about the options that acrylics on a wooden surface opened up for us. Guess, it was time we also gave up on wood paints and stains for a while.

Primer
Textured acrylic primer 

Outlining and base coat
Base coat and outlining

More detailing
More detailing using permanent marker

That she had the clock mechanism with her saved us much time. The clock hands were so beautiful and went so well with the theme of the painting. The usual black / gold ones that I used for my clocks looked more like a drab now.

Wall clock
DIY Wall Clock
It turned out to be a really beautiful clock. If you guys ever get a chance to cross the Stella Marys premises in Cathedral Road, look for the wall paintings outside the college premises. Varsha and her friends did that. This clock painting is only a tip of the ice berg. You will have to see her sketches, and caricatures, and water colors to truly understand the bundle of talent that she is. If you are a keen follower of art, you are sure to discover that later and from a different source.

Traditional Wall clock DIY
Finished Wall clock - Now fully functional

For now, am working on a lampshade and it is for another neighbor of mine. This is more like a workshop and we do hourly sessions based on mutual time conveniences. It is still work in progress and I will come back to talk about that too soon.


  • A laid back evening. There is a bottle of whisky. It’s just the right evening. I sat on the balcony and had it on the rocks. Bliss.
  • An occasion. Dinner with red wine at home. Could I ask for anything more. Indulged.
  • A friend was staying over. Hot summer in Chennai. What better way to entertain and host my guest than with a chilled bottle of beer. It was perfect.
The truth is, am being only 33.33% honest because the other 66.66% is purely my imagination. But that is besides the point. Now, what do I do with all these empty bottles. Earlier we did a madubani decoupage on a wine bottle which still is on our bedroom side table. This time, I wanted to be a little bold and venture into something I have not tried. And so started the bottle cutting experiment.

Collection of bottles
I was not sure what I wanted to make. Maybe a candle holder. Maybe a lampshade. I wanted to worry about what I wanted to make after I master the art of cutting bottles. After watching loads and loads of Youtube videos, I narrowed down three ways to cut bottles at home (You can just do a Google / Youtube search to find the many ways of cutting bottles at home).

DIY Wine bottle holders
Candle holders made with beer bottle
  1. Tie a nail polish soaked thread around the bottle, light it and dunk it in cold water. Didn’t work at all.
  2. Score a line around the point where the bottle needs to be cut. Heat with a candle at the scored line. Chill it with a piece of ice cube. Repeat the procedure until bottle cracks at the scoring point. Worked. But, in an absolutely haphazard way. 
  3. Pour boiling water along the score. Chill with a piece of ice cube. Repeat until bottle cracks. Worked. But then, definitely not uniform and along the line.
The below picture is self explanatory. All of them have gone into the bin after this photo was taken. Two of them in fact broke.
Cut bottles
Badly cut bottles. Guess I need some expert advise here.
Am almost at a point of giving up. I have tried cutting about 8 bottles so far. All miserable attempts. And I stopped midway cutting my last bottle because it was taking too much time. Now am wondering if there is someone who is reading this who can help me out. Have you cut bottles before ? Do you have any tips for me ? I promise I will do something amazing with the cut bottles. But for that, you have to teach me how I can cut them. Anyone ? This is my SOS call before I drown in the sea of giving up my bottle experiment.

Thanks.

Know more about us

About Us
Reviews
Media
Our showroom location
Return and refund policy
Review us on Google

Connect with us


Mail us
Subscribe to our newsletter

Our Address :
Woodooz Home Decors,
3/371, First floor,
Metukuppam, Thoraipakkam,
Old Mahabalipuram Road (OMR),
Chennai - 600097.
Ph : +91 9884070470
Email : contact@woodooz.com
Created By SoraTemplates & MyBloggerThemes