Category : home decor


Do you know we are having our first workshop of the 24th of Jan, 2016 ? Did you get a chance to go through the details of the Woodooz carpentry workshop ? If not, please do and help spread the word around by sharing it with your friends and family. Apparently, such workshops are not so common in Chennai and I want to take it to as many people as interested. Kindly share. While you do that, here is a reproduction of an article that was recently published in The Hindu Metroplus Melange. This is a simple DIY project that you can do with just pebbles and a plywood board. The entire article reproduced below :
 
New Year is over and the next festival is round the corner. Most of you are probably all the time busy planning get-togethers and parties with friends and family. While you do that, how about also decorating your house for those memorable times spent together?
 
If you are looking to replace that old wall-hanging in your home with something that has a more personal touch, here’s a quick D-I-Y décor idea that is simple and easy to execute. It is elegant and will perhaps make you feel proud of your creativity, every time you look at it on the wall. 

Wall decoration DIY
DIY Wall Décor


Materials required

  • Two wooden planks
  • Colours to paint (Depending on the color of the pebbles, use contrasting background)
  • Random-shaped pebbles (You can get it at a local aquarium)

Pebbles from aquarium
Pebbles and a sheet of OST


Procedure

I used one-side teak sheets. They are easily available at plywood stores. I had to match the plank with the colour of the door next to which I was fixing it. However, you can choose to use any dark color, based on your requirement. You can use acrylics, oil paints, enamel paints, or wood stains to color. Work with whatever you are comfortable with. Here's a link to the video on how I stained this sheet of wood.


Staining
Stained OST - Check out video link for the process

Once the base is painted, start sticking pebbles onto the wooden surface. Use a good synthetic rubber-based adhesive, which is available in the market.
 
You can glue them into a pattern or into arbitrary shapes. Give it at least three hours of drying time, and voila, your new handmade wall hanging is ready to adorn the wall of your home!


Use a good adhesive
Plan the positions before you apply glue

As an alternative, you can also apply different colours to the pebbles if you are not happy with their natural look. Give them a vibrant look with your creativity. So, the next time you are at the beach, take the extra effort to pick up some pebbles. You never know when and how they can come in handy.

Wall decked
Trying it along with a wall painting by Preethi

 This article was published in The Hindu on the 26th of December, 2015. Please follow this link for my other published articles. And remember, we are having a hobby Woodworking workshop of the 24th of Jan, 2016. Have you enrolled  ? Not interested ? Have you shared it with your friends and family ? Please do. NOW. Please. :) My next post is a video and am so looking forward to it. A kitchen accessory. Can you guess what ? Please do leave your feedback as a comment. Would love to hear from you.


Sincere apologies for not getting back on how our living room make over is progressing (Read about the BEFORE and AFTER-PART 1 posts before you proceed). Our daughter has kept us on our toes and we are busy baby proofing every single item in the house. From the time we published our earlier post, we have added a few things to give our living room the traditional South Indian feel.

A wooden trunk, restored from an antique wooden trunk- We got this shipped from an antique dealer in Kottayam, Kerala. Thanks to a friend, a native of Kottayam for giving us his contact (for those interested in knowing about this seller, please email us). 


Rosewood trunk
Antique Rose wood trunk
Apparently in the olden days, wooden trunks were used by ‘chettiars’ as a dowry chest and is gifted to the bride during her wedding. It is normally made using rosewood or Burma teak to showcase the extravaganza. This one is made of rose wood and has brass pieces embedded on it to further adorn it. It fits in nicely as a side table in my living room. I added some brass pots (called ‘padi’ in Tamizh and was used to measure grains in the olden days) on them. My ever favorite Buddha piece rests nicely on it (Now don’t ask me how Buddha adds to the Kerala/ Chettinad interiors). I just love the serenity it brings to our home. A Kerala mural is also in progress and I will post the pictures of it once it is complete.

Buddha
The serene Buddha
We also added wooden wall brackets to hang our peacock diya. The wall brackets are made of teak wood and I got it from Kraftome in Coimbatore. They were reasonably priced and of good quality. They may be a bit small to be hung near the roof. But I am ok with the current look until I find bigger ones for a reasonable price. The peacock hanging diya is made of brass and was purchased online. I gave it an antique polish to give it the desired feel.

Note : Could not capture the photo of the brackets as we could not get a good composition at that height.

Peacock
Peacock Diya
Wooden bracket
Diya hanging from the wooden brackets
Finally we fixed a Ganesha brass door knocker. It serves two purpose. One, it forces our guests to use the knocker instead of the bell (with a baby around, a door knocker is better than a loud gong). Two, I think it adds a native touch to our entrance door.

Brass door knocker
Ganesh door knocker
Door knocker - Lord Ganesh
Door knocker - Lord Ganesh protecting the home
We are taking things slow. I am exploring laying athangudi tiles as the border for our floor. We will update about it in the next post. 

Please let us know what you think of the progress.

~ Preethi


Don’t we all love to personalize our living spaces with our signature tastes, and distinctive panache. Some may want to reproduce the prevalent schemes back home in their native (Like the Kerala or Chettinad style). Some may want the décor to be a reflection of their personality (Through colors that represent a certain persona). Some may even employ professional designers to do up their house to their liking. Everyone has their own means of customizing their house. We do it with our DIY and we draw inspiration from exclusive sources like Homify. So much so that we sometimes get asked, “Where did you buy that”, only to be told that we made it, or “Wow ! Did you make it”, only to be told it was bought from somewhere. Either way, it adds that personal touch to our humble abode.

It is time to up our ante and look at things beyond the small items that we have been building here. Time to look at what can get into our DIY checklist to help us add more functionality and glamour to our already DIYed home. And here’s what we came out with.

The best bunk bed in the world

The toddler now sleeps with us. But then when she transitions to having her own room, we want to gift her the best bunk bed in the world. And how? By building it ourselves. Even better, get her involved and have her choose what she wants for her own little world. 

KIDS TREEHOUSE BEDROOM BUNKBED in White : Industrial Wardrobes and drawers by Cuckooland
Pic Courtesy : Cuckooland / Homify

Big, bold and beautiful

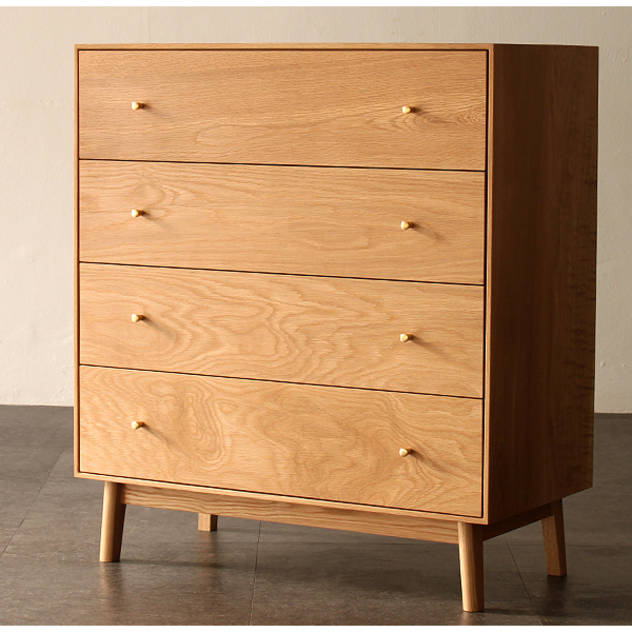
We live in a small 2 bedroom home and every passing day is adding to our need to increase storage space. There are corners around the home that can accommodate additional storage. But hey ! We don’t want any wardrobe, we want our own handmade chest of drawers. Big, bold and beautiful.

Industrial Wardrobes; drawers by GRAINOD
Pic Courtesy : Grainod / Homify

Mini home office

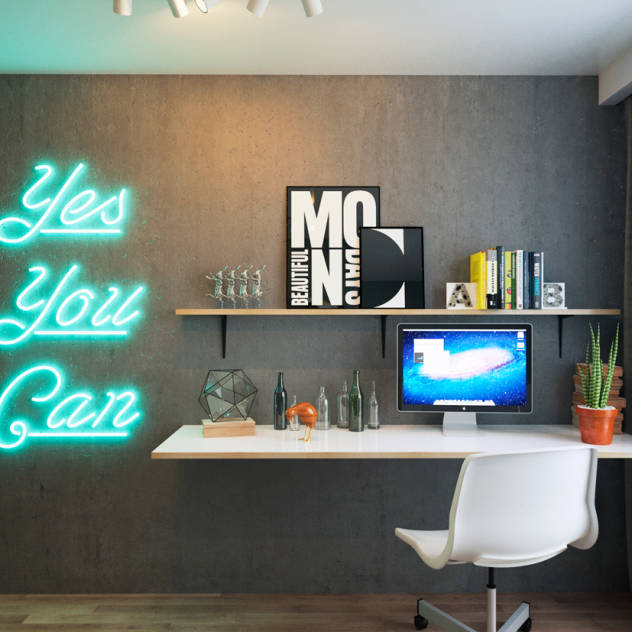
Preethi works from home and I intend to exercise my WFH option on and off. And to be able to cut ourselves off from all the distractions, a dedicated home office space is something we long for, with a small modular work desk that can be folded against the wall when not in use. And yay ! We want to DIY it.

KEFIR HOME : Minimalist study/office by IK-architects
Pic Courtesy : IK-Architects / Homify

Sharp edges to rounded corners

And this one is just to satisfy my ego. If you have been reading this blog for a while, you would know about my love for making square / rectangular shaped lampshades. But then, one day I want to figure out how I can make a wooden frame for a drum shaped DIY lampshade. 

Swallow Lampshade in Purple : Industrial Wardrobes; drawers by Lomas
Pic Courtesy : Lomas & Lomas / Homify
These are mere inspirations that have translated into checklists. It is now up to us to find a way to upgrade our skills and tools to be able to execute them one by one. We have the need. We just want to find the time and the will to do it. Whether it turns out good or otherwise, it will remain personal and special which by now has become our signature style.  Now what do you think ? Doable ? Difficult ? Impossible ? Do share your inspiration story with us and let us know HOW YOU LIKE TO PERSONALIZE YOUR SPACE !

P.S. This is a sponsored post. The opinions expressed however are my own


A long pending post and finally I get to take you through a portion of our home. The saying “home is where heart is” is so apt  as Somu and I spend a lot of time at home - in front of the TV, in the balcony, in our kitchen and just about any corner of the house. Since this was our first home, we gave it a lot of thought, love and care before doing up every piece of it. I still recollect the umpteen number of store visits and countless arguments before we had to choose the color theme, the mood and the accessories that brought life to our little abode. During the time we spent on making our home, we discovered some interesting things about ourselves - our tastes, our love for art and how we longed to personalize everything in the house. Today, as I write this post, it is such a pleasure to look back, remember and cherish every moment of it.

Here are some pictures of our home that speaks a million things about us. Take a glimpse of the walls and every object, each having a happy story to tell.  

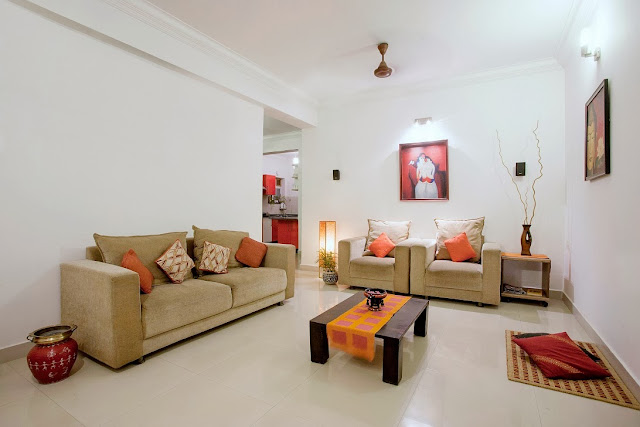
Living room interior
Living Room
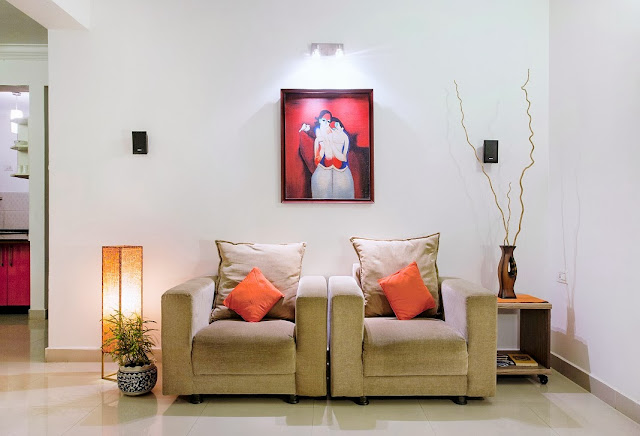
The living room mostly has accents of red, orange or yellow which are supposed to create an environment for lively conversations and happy times. We wanted to have a Buddha sculpture and went with a painting to give it a serene look. The couples painting, the center table and the lamp shade were all added to match with the color theme of the room.

Living room
Living Room again
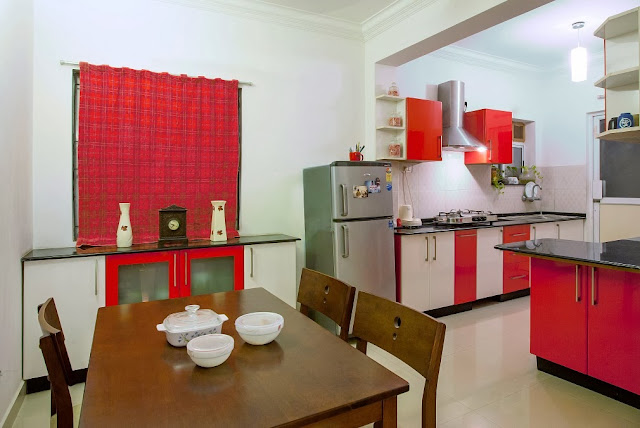
My kitchen is my own space and is the place where I spend maximum time. The decision that took the most time was the selection of colors for the kitchen. And despite all the conventional choices thrown at our face, we went ahead with real bold colors. I have this unusual craze for reds and my friends would relate better to that obsession of mine.  Proud that it even made through the nominee list of Apartment Therapy's small kitchen content.

Red and White Kitchen
Dining and Kitchen Space
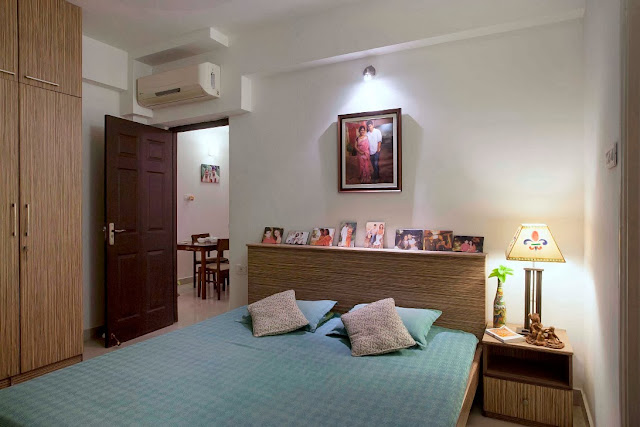
Notice how we had the cot and side table customized to match the wardrobe in the room ? This was one time that we decided that buying off the shelf does not make sense all the time.

Bedroom Decor
Bedroom Space
And that’s about what I wanted to show for the moment. Every room has some stamp of our DIY and we take immense pride in showing them off to every visiting guest  I still have to put up the images of the foyer, the balcony and some of my favorite nooks and corners of the home. But then I will save it for part-II and for another day.

Meanwhile, do leave me a comment. Would certainly love to know your feedback.

~ Preethi

"All Photographs by Architectural Photography Chennai."


Wall clocks and decor

Besides being purposeful, wall clocks are important accent items that can create a dramatic effect to a room. Just like a painting or a wall hanging, a wall clock can give a bare wall an eye-catching appearance. With so many varieties of wall clocks being available, you would only be spoilt for choices making it challenging to choose the right pieces that suit the décor of the room.
Make your own wall clock
Wooden DIY Wall Clock
    Attention : If you came here looking for how to make a wall clock, I recommend that you watch my video post on Clock assembly, Materials to use and how to fix the clock mechanism

Do and DIY

Ever since we started DIY as a hobby, we have tried to not shop for most of the items that we needed inside the house, and that includes wall clocks. With DIY wall clocks, it is easier to live up to the colour needs of the room, matching it with the other accessories. With a design and the required materials in place, it takes less than few hours to more than a day to make a wall clock depending on the intricacy of the design.
DIY Wall clock
DIY clock face template
    To know that there wouldn’t be a similar piece anywhere in the world sure gives a certain kick.

Variety and Exclusivity

DIY wall clocks can have a face made of wood, Plaster of Paris, Paper Mache, or even a decoupaged design. Wooden buttons, beads, wood scraps, screws and many more can serve as the numbers. The colour of the clock is what you decide it to be, the face can take any shape and these factors only provide for boundless creative options when it comes to making your own clock. To me, what is appealing is the exclusivity that is an outcome of any DIY. To know that there wouldn’t be a similar piece anywhere in the world sure gives a certain kick.

Your opinion matters

What do you think of the vivid effect created by the wooden buttons and the gold dials against the darker backdrop of this DIY wall clock? We love it. Do you too? Leave a comment and let us know what you think!

P.S. Linking in : Colours Dekor, Artsy Craftsy @ mindful meanderings


If you liked this wall clock and think someone you know might appreciate it, please do share this post. 


- Somu

Know more about us

About Us
Reviews
Media
Our showroom location
Return and refund policy
Review us on Google

Connect with us


Mail us
Subscribe to our newsletter

Our Address :
Woodooz Home Decors,
3/371, First floor,
Metukuppam, Thoraipakkam,
Old Mahabalipuram Road (OMR),
Chennai - 600097.
Ph : +91 9884070470
Email : contact@woodooz.com
Created By SoraTemplates & MyBloggerThemes