Category : Painting


I have always worked independently on all my projects. Of course, Preethi lends a helping hand, and that’s that. For once, I had a request from my very friendly neighbor(s) if I could help her with a wall clock. Surprisingly, it was the power of Google and my Wall Clock DIY tutorial that led them to me despite meeting and chatting up on a regular basis for the last 6 odd years. And I happily took up the opportunity.

A little background about Varsha. She is a fine arts student and needed to do this as part of one of her final year projects. To make a painting was the need, and the choice of the base was left to the students. She chose to showcase her painting on a clock. 

Do it yourself wall clocl
Beautiful hand painted DIY Wall Clock - By Varsha Sowmyanarayan
My role was to help her make the clock and so we started the project one Sunday evening. I chose to make it with wooden sticks for the frame and OST for the base much like all my other clock projects. It took us less than about couple of hours to get the clock base done. Most of these two hours were spent in waiting for the glue to dry. Once done, it was all left to Varsha to splash it with her creativity. The clock went with her to her home and so Preethi and I were left to wonder what the outcome was going to be like. We had no clue whatsoever, and so that added to the excitement. We didn’t have to wait for more than a day to see what she had done with the clock.

Wooden sticks and OST
Clock base using OST and wooden sticks

Rear of clock
Wall Clock rear side

These pictures were shared with me later. We only got to see the final product and trust me, we were so excited. My clocks mostly had printed images or wooden stain, and so you can understand the delight to see a wonderful painting.  Part of the excitement was about the options that acrylics on a wooden surface opened up for us. Guess, it was time we also gave up on wood paints and stains for a while.

Primer
Textured acrylic primer 

Outlining and base coat
Base coat and outlining

More detailing
More detailing using permanent marker

That she had the clock mechanism with her saved us much time. The clock hands were so beautiful and went so well with the theme of the painting. The usual black / gold ones that I used for my clocks looked more like a drab now.

Wall clock
DIY Wall Clock
It turned out to be a really beautiful clock. If you guys ever get a chance to cross the Stella Marys premises in Cathedral Road, look for the wall paintings outside the college premises. Varsha and her friends did that. This clock painting is only a tip of the ice berg. You will have to see her sketches, and caricatures, and water colors to truly understand the bundle of talent that she is. If you are a keen follower of art, you are sure to discover that later and from a different source.

Traditional Wall clock DIY
Finished Wall clock - Now fully functional

For now, am working on a lampshade and it is for another neighbor of mine. This is more like a workshop and we do hourly sessions based on mutual time conveniences. It is still work in progress and I will come back to talk about that too soon.


[Guest Post by Subbu Padmanabhan]
The delight in seeing one’s own near-perfect handiwork come to life is quite unparalleled by the satisfaction induced by the picture perfect outcome of a qualified expert. This joy provides everyone with unfailing inspiration and so when I experience the same elation, I want to share it. Adding life to walls with cartoon characters may not seem new. But doing it yourself brings in the needed novelty that is a result of your own unique creative skills. I decided to give my son Sharan's room a little transformation with his favorite animation characters and have now been doing it on request from other mothers too. Here's some tips on decorating your kid's room wall  with his / her favorite cartoon characters:

Wall decoration idea
Add life to your kid's room wall with cartoon characters
First and foremost, before you start doing anything with the wall, understand that the result has to interest your kid in the long run. Kids appreciate everything with a fancy value, but tend to move from one interest to the other quickly. Involve your kid in understanding what he / she would like to see on his / her wall for the next few years. You certainly don’t want him / her saying, “Mmmm, I like Chota Bheem better”, after two days of your hard work.
How to paint your kids room wall
DIY Wall Decoration

Materials you can use

From my experience, acrylic colors seem to be the best fit for adding splash of colors on the wall. I have used it on many walls with ease and have seen it give a striking finish to my works.
Wall painting materials
Acrylics for the wall
I use cartoon images from the internet for reference and mark the outline on the wall using a pencil. Once the outline is in place, just paint the colors without letting them spill out of the outline. Cartoon characters look good in solid colors and so you don't need to give any gradient effect to your paintings. In short, very basic painting skill is required to indulge in this DIY fun.
Chota Bheem on the wall
Chota Bheem on the bedroom door
You don’t have to use the whole wall area. Choose a portion of the wall space and make it your canvas. Don’t be scared to alter and give it a makeover.  If your kid would love it, give him / her sections that he / she can complete.  That would add to the fun, right ?

Tips for painting the wall

Wall painting using acrylic colors
The feature wall of the kid's room
It is as simple as that. Take your time. Don’t get bogged down by setting yourself timelines. Get it right and then move to the next step. Enjoy the process. And most importantly, relish the product of your own efforts.  Take pride and show it off to family and friends. I would love to hear your thoughts on designs that you have executed in your own rooms. Maybe, next time I do something like this, I will incorporate your ideas.  Do leave me a comment.

~ Subbu Padmanabhan

About the contributor
Subbu Padmanabhan is a mom to a 4 something year old boy, and works as faculty in a premier play school. She likes to indulge in mini crafts projects, for the school and her home, during her spare time. The wall art that you see in the backdrop of this bedside lamp is her handiwork too. She lives in Bangalore.


There is always this fun activity of engaging my 4 year old niece whenever she comes home. Sometimes it is the little cars, sometimes the crayons and sometimes we play with the scrabble board. Yesterday, when she came home to personally deliver her hand painted diya for Kaarthigai Deepam, Preethi decided to give her some water color challenge. 
I don’t know what is with kids and Dora. When my niece was given an outline of Dora and Boots, she was all the more excited to sit down and complete the task.  She hand-picked a brush from Preethi’s collection and gave the outlined characters undivided focus. Mix of red and white becoming pink had her thrilled and we could see it all over her face. And here’s what she came up with in a matter of 45 minutes.
Water color painting
Dora and Boots in Water Colors
She is the youngest up-and-coming artist in the family that we have featured in Woodooz. You have already met the oldest one here. Give her your feedback and encouragement. We are going to show her this post and read her your comments when we meet her next. 


This pickle jar that was given to me recently comes with a lot of legacy. It comes from my Mother-in-Law's collection of traditional pickle containers otherwise known as Jaadi in Tamil. So in a sense, it is special to both of us and gave me enough reasons to preserve it well and right.
Pickle Jar
Pickle Jar
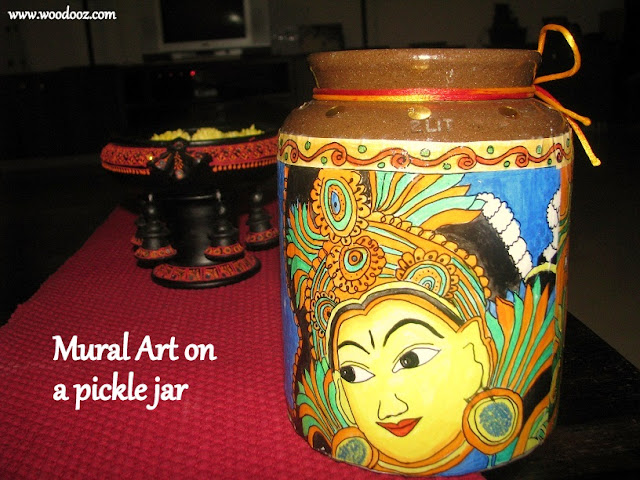
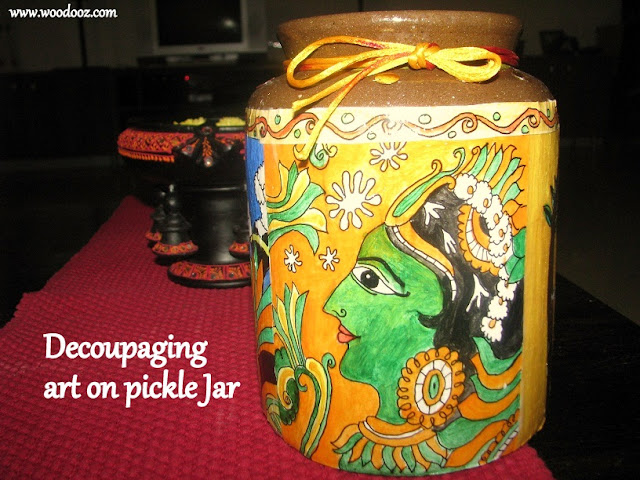
Not wanting to let it store pickles and be stacked inside a cabinet, I decided to embellish it with traditional art and showcase it somewhere in the open. I have been wanting to learn Kerala style mural paintings and so used up this opportunity. I also settled for decoupaging on the jaadi.

To save me some time, I chose to reproduce sketches (duly credited at the bottom of this post) that were already available on the net and added my own choice of colors to the sketches.
Sketch
The sketch
Mural Painting - Work in Progress
Mural Painting and Decoupage - Work in Progress
The paintings themselves did not take much time which made it less time consuming to complete the entire work, though I did it in phases. Just as how Mod Podge is supposed to be used, I was very generous in smearing my paintings with the glue.

Mod Podge
Smearing the decoupage glue
I did not want to complicate it much and so left the top portion of the jar in its natural glory. When I tried decoupage on water colors for an earlier project, I had issues with smudging. This time I was careful enough to use acrylic paint to avoid any blotching.

Kerala Mural Painting
Mural Art on a Pickle Jar
Mural Keral style art
Jar embellished with Kerala Mural Painting
I should thank my sister-in-law for sending me a bottle of Mod Podge from Bangalore. Since I was able to source the decoupage glue, I did not have to resort to Somu’s cheap method of making his own Mod Podge.

I would love to try different styles of painting and your words of engouragement will certainly up my motivation levels. Do leave me a comment and let me know what you think of this work. It would mean a lot.  Also, enter you e-mail address below to subscribe to updates just so you do not miss out on our forthcoming blog posts.

Painting Credits :
I have been true to the sources from where I picked the paintings. If these are not the original sources, I would be happy to make the necessary corrections.

Linking in : Colours Dekor


To be practising an art from an early age and continuing the tradition is one thing. But to show interest in a new art form, learn and master it at 70 something is completely another thing. Today, we learnt that everything is possible if the heart and mind is focused and age is no barrier to imbibing newer faculties and creating magic.
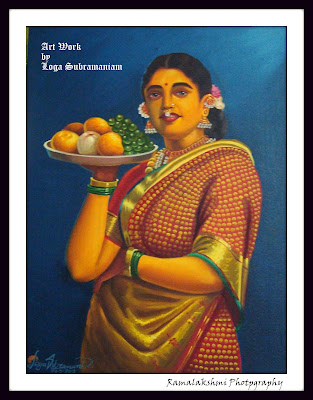
This portrait by my aunt Mrs.Loga Subramaniam, is truly an inspiration to us. Just as art is timeless, this painting establishes that talent knows no frontiers and there is never a laid down age to be trained, to learn and to acquire untried skills. 
Portrait of a woman
Portrait of a traditional Indian woman
Showcase
This portrait apparently is my aunt’s first painting ever (can you believe that !) that she worked on after half a year of formal training. The portrait exudes a certain charm which we believe couldn’t have been possible without a certain innate artist who was only waiting to be unleashed all these years.

Athai, we were struck by sheer joy when we saw this painting and have been talking about it all evening.  You have so evidently shown us the blaze of passion can never be doused by the passing of timeWe are eagerly waiting to see more of your work.

The artist with her painting
The artist with her artwork
Over to you now. Is there something that you have always wanted to learn but have been shying away from ? Have you kept  yourself away from learning a skill because you thought it was too late to grasp the concepts ? Tell us about it. And also remember to leave a comment rightaway on what you think of this painting. Your kind words mean a lot.

Join us in Facebook

This post is partially a translation of a similar post made by my cousin Ramalakshmi who is a passionate photographer and a Tamil enthusiast. She is a renowned blogger from Bangalore who manages a very active Tamil blog. Her photos, poems and articles have consistently found their way into well known Tamil websites and print magazines. The credit for the photos in this post goes to her.

If you liked this, you may also like:

Linking in : Colours Dekor


A triangle, a circle, a square and some lines.  The tribal women of Maharashtra used just these figures to create a traditional folk art popularly known as Warli.

These paintings depict the social life of these tribes and are predominantly painted in white on mud walls. As is evident from many Warli paintings you may come across, they portray human figures that are dancing, farming, hunting or indulging in other such regular activities.
Now, why am I talking about Warli all of a sudden ? I recently noticed Warli art in the walls of my favorite restaurants in Chennai, and I was mighty impressed at where and how they had used it. Considering I found it in a space where I least expected to see an ancient art, I wanted to share it here. Even from the central figure in the art below, I can bet my bottom dollar that you cannot guess where the below picture was taken.
Wall art using Warli
Warli art on the wall
Would it surprise you if I said I clicked this in the men's room ? I don’t know if it is any desecration of an age old art, but I sure know someone really put his / her creative mind into good use here. Seeing this, I could not stifle my chuckle, and in all the urgency I had, I managed to stop and click this picture J
Warli Painting
Indian Warli on a European closet
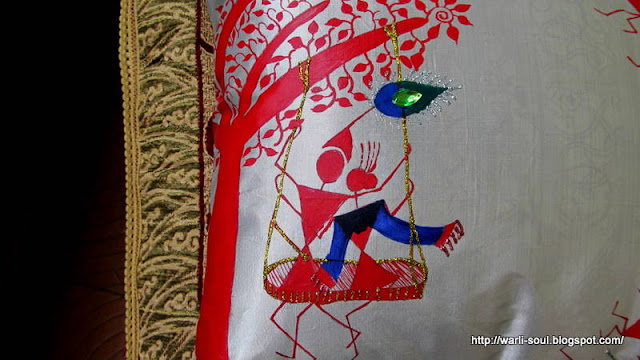
Talking about Warli and creativity, I am reminded of Aparna of Warli-Soul and so wanted to dedicate this space to  mention her work. They say Warli does not depict mythological characters or images of deities, but here is someone who stretches her imagination to create beautiful art out of the same Triangles, Circles and squares.
Indian art Indian God
Radha and Krishna on Warli - By Aparna
I so love niche blogs and I believed Warli as a niche had very limited scope for variety. I have time and again been proven otherwise by her work. She is a trained Warli artist who portrays these stick figures in newer, modern backdrops. Patricia of Colours Dekor also carried a feature of this lovely blog under the blog finds category. I strongly recommend that you check her blog Warli-soul to know what I am talking about. 
Warli Painting - by Aparna

Subscribe to our RSS feed

Meanwhile, I am going to have Preethi do a Warli on one of the walls at home. Help me convince her :)

You may also be interested in

Linking in : Colours Dekor
- Somu


Madhubani - Kalamkari Ganesha on hand made paper

This is not an original painting. It is a reproduction of Naatiya Ganesha I came across in the exotic Indian art gallery.
Somu and I have been wanting to put up a home tour for the last 2 years. Some how I have been postponing it as I am yet to fill up some walls with something interesting. One such wall is the entrance foyer and I finally managed to paint for it. I decided on Madhubani which has always been my favorite art style.
Madubani - Kalamkari Painting
Dancing Ganesha - Madhubani design on hand made paper
This time I chose madhubani style with kalamkari color combination on some left over hand made paper. For my earlier Ram - Seetha madubani painting, I had used acrylic colors. So it was quite easy this time. Acrylic works the best on handmade paper as the density is not as heavy as oil or as low as water colors.
Madhubani design of Ganesha
Madhubani  painting - A closer View
As for the thinner, I prefer acrylic gloss medium  as it prevents blotting of hand made paper. The outline on the entire image was made using black felt tip pen. So here goes - Madhubani Dancing Ganesha in our entrance foyer. 
Ganesha Acrylic painting on handmade paper
Ganesha - Acrylic painting
We wanted to save some time and did not want to indulge in DIY photo framing. Since we wanted the frame to match the rest of the framing that we did for the other paintings at home, we gave that task to our regular framing vendor. 

Your turn now : Tell me how you like the painting. Good, bad or otherwise, please leave your comment. It will fuel my passion and make me want to do more.

~ Preethi

You may also be interested in our other works in the entrance foyer

Linking in : Colours Dekor


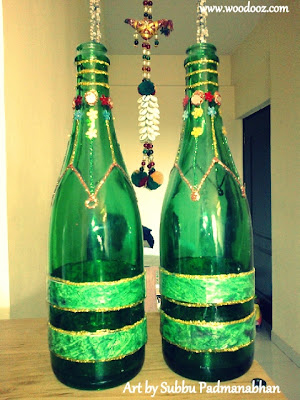
So far, Woodooz has always been about our works. We thought it is about time that we also use this platform to showcase arts and crafts by others, particularly those that do not have a blog to write about their work. In the recent days, we have been reaching out to talented friends and family and the first in this series of Woodooz Showcase is a DIY bottle art by my sister Subbu Padmanabhan.
Preethi and I have always been fascinated by wine bottle art, and so when we laid our eyes on these bottles during our last visit to Bangalore, we wanted to know how it was done.
DIY Wine Bottle art
DIY Wine Bottle Art
Woodooz Showcase
               Art by Subbu Padmanabhan
So here it is, in her own words : 
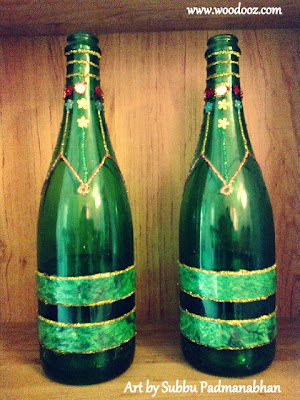
"I wanted to keep it simple and so went for a minimalist design. The green wraps that you see in the bottom is handmade paper, bordered with glitters. I stuck the paper on to the bottle using cellotape."
Yeah, Cellotape. No fancy decoupage glue used. 
How to recycle wine bottles
Wine Bottles - Recycled
"For the top, I again chose a simple design, and had it drawn lightly using a pencil. I filled up the line drawing with Fevicryl 3D glitters. I then completed the design by gluing sequins around the top of the bottle"
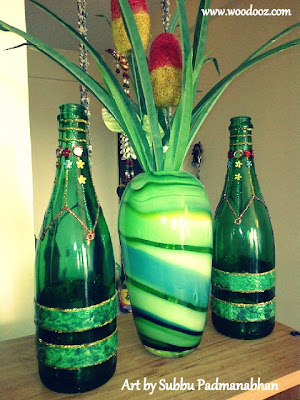
Wine bottle Craft ideas
Craft idea for your Wine bottles
"I left most of the surface area of the bottle blank, because the green backdrop was by itself enhancing the look.  And now this pair of bottles lay right where everyone can see them - In the living room."

So how did you like it ? Sometimes overcrowding can be an overkill, and we thought it is the simplicity of the design that makes it stand out. Leave your comments and let the artist know what you think of her work.
Another wine bottle idea that we loved : 
by Sarmistha Roy 

About the Artist
Subbu Padmanabhan is a mom to a 3 something year old boy, and works as faculty in a premier play school. She likes to indulge in mini crafts projects, for the school and her home, during her spare time. The wall art that you see in the backdrop of this bedside lamp is her handiwork too. She lives in Bangalore.

You may also like :

Linking in : Made with Love PartyColours Dekor
- Somu


When I wanted to professionally learn art to hone my skills, I turned to Mrs.Jebamani Elango who is our friend's mom and also the art teacher in Somu's school. Both uncle and aunty are amazing professional artists, and were kind enough to accommodate my request to help me with improving my skills.
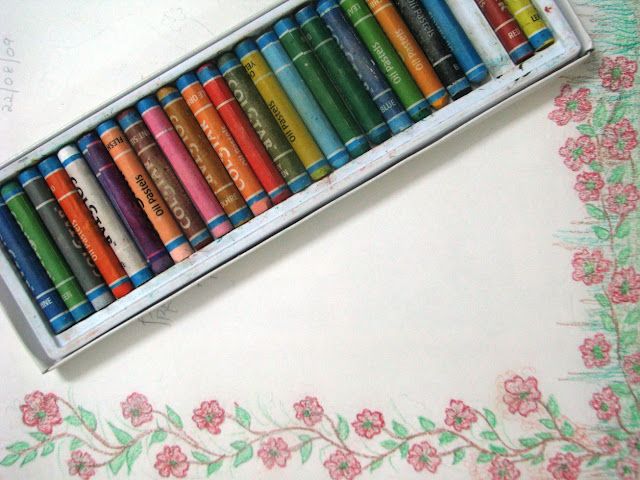
Though it was oil painting (Check out Buddha on Canvas and an Aravind Kolapkar reproduction) that I wanted to particularly learn, they advised me to start with Oil Pastel to better understand the fundamentals. While all the paintings below are my own handiwork, the credit to the originals go to Mr. and Mrs. Elango (Wish I could link them here. But they are not on any social media) whose work I merely reproduced. 
Oil Pastels
Art book and oil pastels
The below scenery apparently is a place in Kodai. This was uncle's work and he gave it to me to start off my learning process. Lot of corrections were suggested and I learnt how to give depth to a painting.

Scenery using oil pastel
A serene place in Kodai captured in Oil Pastel
I followed it up with another scenery of the woods. I learnt more about giving depth to a painting. Again this is a view of one of the many beautiful places in Kodai.

Woods - Oil Pastel
Woods - Oil Pastel

Know more about us

About Us
Reviews
Media
Our showroom location
Return and refund policy
Review us on Google

Connect with us


Mail us
Subscribe to our newsletter

Our Address :
Woodooz Home Decors,
3/371, First floor,
Metukuppam, Thoraipakkam,
Old Mahabalipuram Road (OMR),
Chennai - 600097.
Ph : +91 9884070470
Email : contact@woodooz.com
Created By SoraTemplates & MyBloggerThemes