Hobby woodworking with limited set of tools can make you believe you need to take lesser precautionary measures. However, it is  true when they say safety should be given prime importance irrespective of the size of any woodworking project. Working with fumes, dust and wood chips may be seemingly harmless, but they can have radical outcomes if necessary caution is not exercised. So, here’s a list of three safety gears that I feel are essential and important for a hobby woodworker:

Safety Eye gear / glass 

Using a power drill for drilling a hole in concrete walls or wooden planks can be potentially dangerous if the bit were to break off during the process. Protect your eyes unless you want a flying piece of bit piercing right through your eyes. Saw dust and wooden chips also need to be kept away from the eyes. I don’t work with flames, but then if you are the types that uses gas welds, you know what I am talking about. Wearing an eye gear may seem unnecessary and also obstructive to the task at hand, but goes a long way in ensuring your safety. Do save your eyes. You may want to give them to someone later.
Safety Glass / Eye gear

Safety gloves

Wood chips’ getting into my skin is a common issue that I used to face, especially while sanding plywood. Just one slip is all it takes for a chip to prick through your finger. The sore palm is another experience that I had to go through before I learnt wearing gloves is important. Not only does it prevent minor mishaps, it also provides for a firm grip while handling tools. The hammer falling on your feet is the last thing you would want. And unlike the eye gears, gloves are comfortable to use and really aid in handling tools better. Use of latex gloves (Available at Rs.3/- a pair at Nilgiris) while painting / staining / varnishing is also recommended.
Safety Gloves

Respirator

Stains exude invisible fumes, paints and primers smell bad, and saw dusts usually fly all over the place. When it comes to matters of the lungs, it is always and always critical to be safe. Just as smoking is, inhaling fumes and dust are health hazards too that you would want to stay clear of. Working in a highly ventilated area is probably the best tip you can get as far as using stains or varnishes. But like me, if you work in the confines of your home, BEWARE. Fumes have a wider reach and they can very quickly spread through the entire house. I sometimes have to insist that my wife wears a respirator too. Your safety and your family's, they go hand in hand. The least you can do - Cover your nose with a hanky at all times.
Respirator / Face Mask

There are other safety equipments and gears that one may need to use depending on how heavy duty their work is. But for a hobby woodworker that uses minimal power tools, I feel glasses, gloves and masks are mandatory. Here are few other safety tips that should follow:
  • Wear appropriate and tight clothing. You may not want a Power drill to accidentally get caught in your loose outfit. Just imagine a dupatta getting caught in a motorcycle wheel. It is kinda exaggerated, but am sure you get the point.
  • Wear shoes if you can. Hammers, wooden planks, Paint cans and other heavy tools – All of them have the potential to break your feet, crack a bone or at least to give you one painful moment.
Safety before all else. Always remember that and have fun with your creations !

Show your awesomeness. Click here to leave  us a comment.


Have you ever had an "If-only-I-had" moment while working on a project ? It could be as simple as acrylic paint spilling on your dress or a hammer almost crushing your thumb... What is your take on safety while working on simple DIY projects. Share your thoughts. Leave a comment.

Linking in : Lines Across My Face
- Somu


Three days of solitude and this is how I made use of it... :) One of our long term wishes was to own a Buddha painting/sculpture. Whenever I got the thought of painting one, I always decided not to venture into it. Simply because I wasn't confident enough to get his features right and give it the desired effect. His calm eyes, his enlightened forehead, the knot of hair and his long ears (sign of intelligence) - they need justice.
Buddha Painting on Canvas
Finally, I decided to give it a try. I knew I wanted an oil on canvas for it. I chose the color theme as yellow ochre and red- something that would go well with our living room/foyer. The base layer was first done using raw sienna. Colors like Raw/burnt sienna have warmer tones and are transparent. So they give a wonderful glazing effect. If one doesn't have either of these colors in the palette, you can get it by mixing cadmium light with burnt umber.

Second step was to fill the background with shades of vermilion red, black, chrome yellow, burnt sienna. I tried giving it a textured finish. But I am not sure if I have achieved it. For the Buddha, the base color was yellow ochre followed by burnt sienna.

To show his signs of enlightenment, I chose chrome and lemon yellow and white. Basically these shades are opaque and are wonderful as highlights. The lotus was a final addition to the background. :) So here is it. Your opinions/comments would be highly valuable for me to make any modifications. Please let us know. :)
Did you like this post ? Enter your E-mail address and join our growing E-mail list


If you liked this painting, you may also like:

- Somu


Wall clocks and decor

Besides being purposeful, wall clocks are important accent items that can create a dramatic effect to a room. Just like a painting or a wall hanging, a wall clock can give a bare wall an eye-catching appearance. With so many varieties of wall clocks being available, you would only be spoilt for choices making it challenging to choose the right pieces that suit the décor of the room.
Make your own wall clock
Wooden DIY Wall Clock
    Attention : If you came here looking for how to make a wall clock, I recommend that you watch my video post on Clock assembly, Materials to use and how to fix the clock mechanism

Do and DIY

Ever since we started DIY as a hobby, we have tried to not shop for most of the items that we needed inside the house, and that includes wall clocks. With DIY wall clocks, it is easier to live up to the colour needs of the room, matching it with the other accessories. With a design and the required materials in place, it takes less than few hours to more than a day to make a wall clock depending on the intricacy of the design.
DIY Wall clock
DIY clock face template
    To know that there wouldn’t be a similar piece anywhere in the world sure gives a certain kick.

Variety and Exclusivity

DIY wall clocks can have a face made of wood, Plaster of Paris, Paper Mache, or even a decoupaged design. Wooden buttons, beads, wood scraps, screws and many more can serve as the numbers. The colour of the clock is what you decide it to be, the face can take any shape and these factors only provide for boundless creative options when it comes to making your own clock. To me, what is appealing is the exclusivity that is an outcome of any DIY. To know that there wouldn’t be a similar piece anywhere in the world sure gives a certain kick.

Your opinion matters

What do you think of the vivid effect created by the wooden buttons and the gold dials against the darker backdrop of this DIY wall clock? We love it. Do you too? Leave a comment and let us know what you think!

P.S. Linking in : Colours Dekor, Artsy Craftsy @ mindful meanderings


If you liked this wall clock and think someone you know might appreciate it, please do share this post. 


- Somu


Do you have the need to cover a cabinet with a glass door?
Do you feel your existing cabinet glass door can do with some newer look?
Or do you just wish to learn something cost effective and functional?
Then this tutorial is for you.
After three years of following up with the original vendor who built our TV floor unit, we decided to install a door for the centre cabinet .The DTH system and DVD player are remote controlled and hence installing a glass door was the obvious choice. Here’s how you can do a glass door installation.


Cost of project: Low- includes cost of the glass panels, and glass door hinges
Difficulty level: Medium to high
Time required: 2-4 hours


A plain wall needing embellishment can certainly set off the DIY instinct in us. While creating a new piece of art is the most obvious choice, we sometimes tend to forget our works from the past that are crying to get out from the dark insides of their designated storage space. More often than not, everything that is preserved tends to get ignored and lose to our own yearning to craft something new and more creative. Such discrimination is usually meted towards work we believe isn't our best. 
We may have moved on from being a novice, but it gives no reason to disregard our previous work as a rookie. It may have its imperfections, but every work of art that is our own is a masterpiece in its own right and deserves to be proudly displayed on a wall or a glass case where everyone can see.
Old floral painting from the archives (2003)
Floral water color painting
Revived, framed and displayed (2011)
Do you agree? Would you rather work on a new project than to resurrect an old work of yours? How do you ensure all your work get that much deserved showcase space? Share your views. We would love to know your point of view.
Note : This painting is a reproduction that I painted way back in 2003. If you do know that original artist, please do drop me an e-mail at woodoozmagic@gmail.com

~ Preethi


P.S. Linking in : Lines Across my face, Colours Dekor

- Somu


Installing a cabinet door is a very easy and functional activity and can be done with the help of few easy-to-use tools. While the need to install a door may not be so frequent, this tutorial will help when you have a creaking / broken door that needs replacement. Considering this is the first DIY tutorial on Woodooz, I would appreciate any comment/ feedback. Feel free to drop in your opinions. 
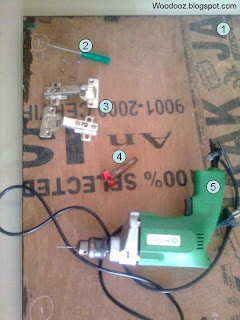
This tutorial is also useful if you are specifically looking for details on how to install door hinges / European cup hinges. Note: Click on the pictures for a bigger / clearer view if required

CONTENTS
1,2:Cabinet identification,Materials reqd 3. Plywood door dimension 4. The European Cup Hinge
5. Mark Points to Secure Hinge 6,7 Bore hole, Install door 8. Add more hinges


Step 1 - Identifying the Cabinet
Step 2 - Materials Required

Step 1 : Identify Cabinet Needing a door (Back to Top)
  • Identify the cabinet needing a door
  • Our TV stand turned Shoe Rack badly needed a door and was the obvious choice for this exercise. The rack is in the living room, and going by the contents in the cabinet, you can pretty much understand why this needed to be covered.
  • Measure the sides of the cabinet before buying the plywood for the door

Step 2 :Materials and Tools required


Indiantopblogs picks Woodooz from amongst 38 deserving nominations for their first edition of "blog showcase - A window to feature quality Indian blogs".

They have also inducted Woodooz into their directory of best Indian blogs under the "Arts and Crafts, Paintings, Architecture and Design" category.

Here's the mail from the ITB team that made our day :)

Hi

We are glad to announce that your blog has been showcased on Indian Top Blogs. It can be visited through the following links

1. http://www.indiantopblogs.com/2011/09/woodooz.html
2. http://www.indiantopblogs.com/search/label/blog showcase
3. On ITB site, clicking on the blog showcase button on the navigation bar below the blog title
4. On ITB site, clicking on ... blogs showcased under the Let's showcase your blog section in the blog footer

Your blog has also been listed in the Directory of Best Indian Blogs.
It is in Arts... category.

Best of blogging!

ITB Team


Update:Woodooz is no more part of the Indian Top Blogs directory as of Dec 1, 2011

- Somu


This one was custom made for a colleague.We provided a 3-D view of the design we had in mind and after few mail exchanges, the design and the dimensions were finalized. While a detailed step-by-step DIY of this project with pictures is due, here is a list of learning that we had from this project.
Low Center Table design
  • Having a design on paper helps understand the material requirements better. There was zero wastage on plywood that we bought for this project. It also helped arrive at a near accurate estimate of the cost. Check out the finalized design we made for the project.
  • Allenkey cross dowels are pre-dominantly used in making knockdown furniture. Here's a good tutorial on how to install these dowelsCross dowels in Chennai are probably available only in Parrys and so we used ordinary bolt and nut as an alternative. In the process, we have learnt to understand little bit on the nuances of knockdown furniture.
  • Though leaving the grains open is more of a trend in recent times, we learnt that using paste fillers can help fill the grains resulting in a much smoother finish (Thanks to a 10 min session with a professional carpenter).
  • We also learnt how to install a glass shelf. And that means few more projects that we wanna do using glass and we incidentally have one requirement at home. More on it later.
Center Table
Center table with glass shelf
  • Plywood is ideal for smaller stationary projects, but the more the use of plywood, the more it adds to the weight. We learnt that we may have to look at alternate lighter raw material for any such projects in the future.
  • It is not always required to start with an 80 grit sand paper and work towards the denser ones. For some of the pieces, we had to start with 120 grit. The use of sand paper is subject to the existing smoothness of the surface.
  • Use of plywood edge banding is recommended. We learnt that applying putty and painting  edges may not provide the desired finish all the time.
  • We also learnt, if one is losing 99 strands of hair per day, it is better to wear a cap especially during the process of varnishing.
  • It is better to understand the workload involved besides knowing the amount of time one can spend on such projects outside of their day jobs. It helps better to set the right expectations in terms of timelines. We are still novices and still battling with estimating the right workload, but we have learnt that we need to factor unplanned weekend activities (family trips, functions, work etc...) before committing timelines. 
Do let us know what you think. Any feedback / comment is welcome. Do you think there is something amiss ? Share your thoughts.

P.S. Linking in : Line across my face, @thepicketfence, Colours Dekor


My fetish for Madhubani painting continues.. Although we shifted to our new house 2 years back, decorating it happened in phases and is still happening. We still have to adorn our walls with interesting art pieces. One such wall was the partition between the living and master bedroom. I found a beautiful Madhubani wall hanging in My Dream Canvas and was completely awed by it. We had leftovers of hand made paper that we bought for our earlier projects.

Madubani Painting

Madubani Wall hanging
You would get handmade papers in Fab India. We purchased ours from Auroville on Cathedral road, chennai. The problem with hand made paper- water or oil based painting cannot be done. It has to be acrylic and I used acrylic thinner as the medium. To give it a 'close-to-original' look, I used just the basic colors. (In the past, people only used vegetable dyes and hence had fewer color options). So here it is - Ram and sita who are the subjects in most Madhubani paintings.


We couldn't wait for the framed pictures to get displayed. It took less than 10 minutes for it to get installed making an electric drill a handy tool to have at home :)

~ Preethi


What is Sanding ? It is is a tedious, yet a necessary activity in the process of woodworking. Using a sanding block is much convenient than trying to sand with the sand paper folded. The block allows for easier application and equal distribution of pressure on the piece of wood and hence gives better results.


How to make a sanding block at home
Though sanding blocks are commercially available, you can make one at home. 
  1. You would need - A palm sized scrap piece of wooden block. If not, even a detergent bar would do. A Scorch bite (Cork is normally recommended) for the smooth underside to lighten the impact on wood. A screw / nail for a better hold.
  2. Stick the scorchbite onto the block using fevicol.  The screw / nail is drilled into the top of the block.
  3. The nail / screw is primarily for a better hold when sanding. It allows for an easier grip of the entire block between your fingers.
  4. Insert a small chunk of sponge around the nail / screw to protect your fingers from possible irritation / pain.
  5. Cut the sand paper to a width longer than the block for you to hold it during the process of sanding. While a folded sand paper serves the purpose, it can put lot of strain on your arms. You would most certainly find it easier now to sand flat surfaces using the block. 
~ Somu

P.S. Linking in : Kreative Korner

- Somu


When custom making furniture, the end user may want to have an idea of the product through a 3-dimensional image (Check out our 3D gallery of furniture). Besides serving this purpose, a 3D image is also useful to estimate raw material requirement, identify areas for additional reinforcements, play around with colors, and most importantly to arrive at a near accurate cost estimation. Having a 360 degree view helps plan for every possible requirement in advance as against learning and applying during the making process.

Creating a 3D image is easy if your basics on geometry, elevation, projection and perspective are intact. It is addictive and you can see yourself creating more designs - copied, inspired, original or otherwise. This coffee table was inspired by many similar designs and has been approved by the potential user. It is now work in progress and likely to be completed in another week. For this project, I used Google Sketchup.

Creating a 3D design of a room using Google Sketchup

Sketchup is a freely available Google tool that allows for creation of 3D models of furniture, rooms, and other design models. It is used by designers to play around with their designs and comes with a user friendly interface.   I created this 3D model of our kitchen for the SMALL KITCHEN COMPETITION @ APARTMENT THERAPY. Considering I have very limited background on design, you can imagine how much of an easy to use tool it is.

P.S. Linking in : In the Studio, Sneak peak, Kreative Korner, @ the picket fence, Colours Dekor, Lines Across my Face, todayscreativeblog


Over to you : Do you plan your designs prior to implementing them ? Be it decorating your room, or building a piece of furniture, do you visualize what you want and how you want through an interface besides your mind ? What tools do you use ? Or do you love the traditional way of capturing your visuals in a paper ? Share  your thoughts.


- Somu


Somu was the one who introduced me to Decoupage and I wanted to try something with it. Decoupage is the art of decorating an object by sticking colored paper cut outs onto it. It could be bits of news paper, color papers, hand painted sheets, interesting patterns on fabric. You could choose any object that needs a totally different look, stick the cut outs onto the object using mod podge (an alternate here in Chennai is decoupage glue/hobby ideas-glue n gloss. You can get it from Hindustan traders, Ananda/RS stores on LB Road or any craft store). Basically the glue acts like varnish. Each layer of cut outs is glued atleast 6-7 times until the 'stuck on' appearance dissappers and the result looks like a collage painting.

Decoupage on a wine bottle
DIY - Madubani - Decoupage


Here is something we tried decoupaging on- a wine bottle. I painted different themes of madhubani (ganesha, peacock, fish, sun, butter fly) in bits of paper of different size and I randomly stuck them on to the bottle. Take care to stick it without any wrinkles to have a better finish. You can use decoupage glue to stick it. Layer it with the same glue and let it dry for 10-15 mins. Repeat this multiple times until you get one smooth finish. I just love the finished product. I got double the pleasure doing this as I learnt two techniques in one- decoupage and madhubani :)

Pin It
- Somu


Paper mache traditionally has had many functional uses. It was used in winnow baskets (Muram in tamil) for giving the cane frame a stronger and smoother finish. I also hear my grand mother used to make paper mache baskets for storing rice. For quite sometime now, it is an extensive medium for various crafts. With merely used paper as the raw material, you can make trays, pen / magazine holders, lamp shades, earrings, beverage coasters, toys, decorative items and much more if you unleash your imagination.
Paper Mache
Paper Mache DIY
Paper mache turotial

The craft is not limited to only the smaller objects. We used to make 30 feet structures in our arts and decoration club in college.  While making the paper mache mix warrants a separate, detailed post by itself, you can find a brief overview of  how to make the paper mache mix from an earlier post of ours.
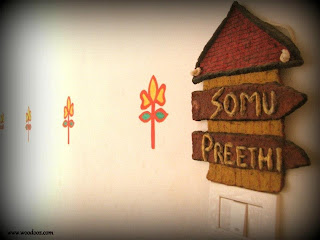
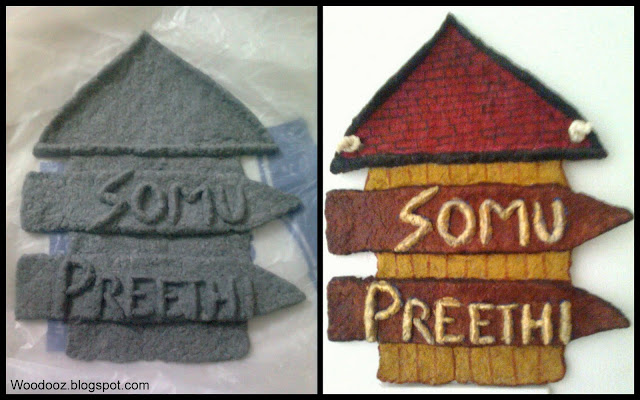
Paper Mache name plate
Paper Mache Name Board
For this name board, the shape of the house was first made and then the letters, which were stuck to the backdrop. Paper and maida being the only base, you would be surprised at the strength the whole mix attains after drying, which takes about 2 days. You can use putty (Chalk powder) for a smoother finish, paint with your desired colours / design and give a coat of modpodge for protection. On the whole, a very lovely craft.

~ Preethi
Did you like this post ? Enter your E-mail address and join our growing E-mail list

P.S. Linking it : Romantic Home, Kreative Korner, @thepicketfence, Coloursdekor
- Somu


Though, when I bought the terracotta pot, I had intentions of adding color to it, I had not planned on anything particular. I first painted the whole pot red (oil paint) and when I was looking for designs to complete the look I desired, I chanced upon Warli painting at Coloursdekor.
Warli Pot Painting
It seemed simple, and yet very charming. After a little bit of research and reading up, I decided to do the Warli for my waiting-to-be-finished pot. The activity, besides being lots of fun, also ended up giving my pot a really chic look. Considering it is made using very simple shapes, it is most certainly something everyone should give a shot at. Now am happy to move my pot from the balcony, right into the living room where everyone can see it.
- Somu


DIY Wall Clock kits not being so commonly available here in Chennai makes such projects very exciting.
clock face template
Wall Clock Template

Make your own wall clock
DIY Wall Clock
Making this wall clock template was so much exciting as I went from one design to the other before finalizing on this green clock. Creating  DIY clock face templates is fun and it sure warrants a separate post.

This template was created using MS PowerPoint tool. I used the donut shape from the “Basic Shapes” in ppt onto which we placed the numbers (big fonts), each with a 30 degree angle between each other. I picked the background from internet (due credit to source is pending), and made the inner circle semi-transparent for the added effect.

This clock face was then printed onto an A2 poster paper and then neatly cut along the clock borders. The printed template was glued onto a 4mm think One Side Teak (OST) sheet (You can instead use 6mm plywood).  The OST was then given a border using 1cm x 1cm wooden sticks. The clock was inserted from the rear through a hole drilled in the centre of the OST sheet.

So, what do you think ? Do you like this clock ? Feel free to download and use the template. If you did like it, you may also be interested in this clock template built using OST and buttons and also this wooden clock that was eventually stained dark. 

DIY Wall Clock kits not being so commonly available here in Chennai makes such projects very exciting.  Just love the way it has turned out. We would be delivering the clock tomorrow and so are quite excited to know the reaction. :)

If you liked this clock, you may also be interested in our other clock projects:
DIY Wooden Wall Clock with template
Wall decor using Wooden Wall clock
- Somu


Pencil Sketch - Horse
Yesterday, I was done with work, made dinner pretty early in the evening and was wondering what to do for rest of the day. It has been a long time since I took my art book out. So thought it would be a good time to do something with it. So here is the outcome- a pencil sketch of a horse. I have not tried much of sketching and this turned out pretty decent. Now I am all excited to try out more of it.

P.S. Linking to Colours Dekor

Inspiration : Deebeeaar
- Somu

Know more about us

About Us
Reviews
Media
Our showroom location
Return and refund policy
Review us on Google

Connect with us


Mail us
Subscribe to our newsletter

Our Address :
Woodooz Home Decors,
3/371, First floor,
Metukuppam, Thoraipakkam,
Old Mahabalipuram Road (OMR),
Chennai - 600097.
Ph : +91 9884070470
Email : contact@woodooz.com
Created By SoraTemplates & MyBloggerThemes