Category :
DIY paper mache
Saturday, October 26, 2013
[This is a guest post by Sharmilee Muralidharan]
First of all, big thanks to Woodooz for
this Paper Mache recipe, which woke up the crafty girl in me and there is no stopping it now. Beware. This is a dangerously obsessive craft. I chose eco-friendly-NO-plastic-in-any-form concept for my Golu 2013 and that led me to making handmade items. It was very challenging, but learnt a lot in the process, and it pushed me to create a lot of things.
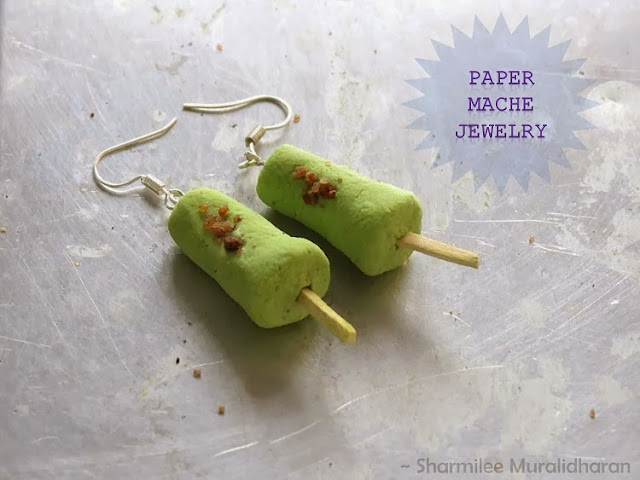
1. Paper Mache Earrings (using kitchen paper towel)
 |
| Paper Mache Jewelry |
I made some clay jewelry as return gifts and thought would make jewelry with paper mache too. I didn't have any paper pulp remaining and so
made this quick recipe:
- Soak few sheets of kitchen paper towel in boiling water for an hour
- Squeeze out the water, and grind them in a mixer into a smooth pulp (as much as possible, can add water while grinding which can be squeezed off later)
- Strain them on a strainer for sometime or squeeze out the water by hand. Once all water is squeezed out, add Fevicol glue.
- Keep adding the glue in small amounts and keep kneading it till it becomes a dough (it resembles a cookie dough).
- I also added a little bit of all-purpose flour/ Maida and salt, which added smoothness and I felt they helped in making shapes better than the one without it.
|
When it is wet, insert the required jewelry hooks and allow it to dry. Once dried, you can paint them and apply a coating of Artist's picture Varnish .
If small pieces or shapes are made, instead of painting after drying, you can add acrylic colours to the pulp when it is wet, like I did for this Kulfi earring and then dry it. Though they can be sanded smooth, what I like the most in these is the unfinished rough look.
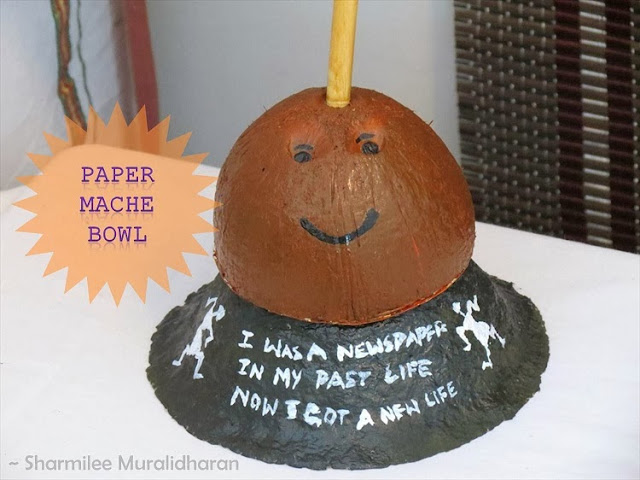
2. Newspaper paper mache bowl
 |
| Paper Mache bowl |
This is a technique used during our grandma's time to make vessels out of paper mache. I used a Styrofoam bowl as a base. I applied paper mache on the outside of the bowl, covering it completely with the pulp, and allowed to dry for 4-5 days. Since the Styrofoam is flexible, the bowl comes out easily after it dries. And it can be painted as per wish. I used this as a prop for my Golu below a painted coconut shell.
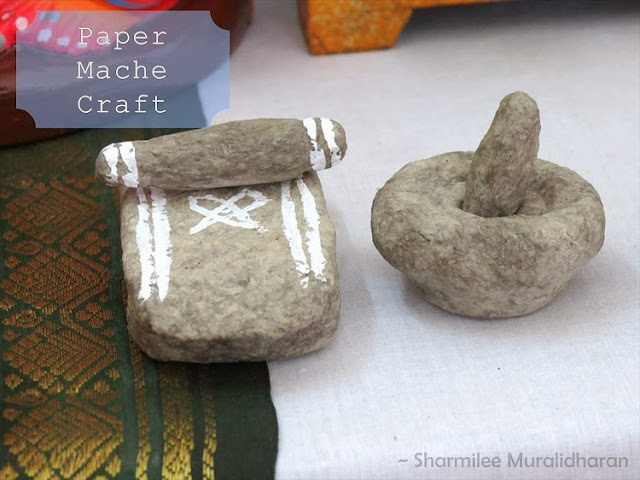
3. Aatukkal and Ammikkal (yesteryear's grinding stone)
 |
| Paper Mache miniatures |
When the paper mache bowl was drying, its colour and texture reminded me of the grinding stones. Immediately planned to make these for the Golu. I used a match box as an armature/base for making the Ammi (the flatter grinding stone) and shaped the ends accordingly. For the Aattukal no base was used, just made a ball, and slowly shaped them with hands. All my golu visitors loved them, they all thought these were real miniature grinding stones until they touched and felt them. They are as light as a feather.
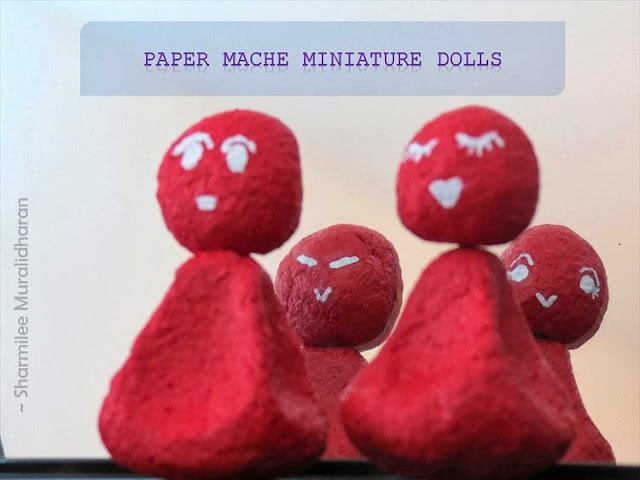
4. The Maaya sisters (miniature dolls)
 |
| Paper mache dolls |
With the leftover paper clay I made a small doll with a curvy base, so they dance if you push them. No base was used for this. I inserted a thin steel wire as support for the head and the body, though not required. I painted a face both in the front and the back with different expressions and kept them in front of the mirror to click this photo. I made only 2 dolls, but there are 4 girls in total. I call them The Maaya sisters.
5. Paper Mache Rangoli
 |
| Paper mache Rangoli |
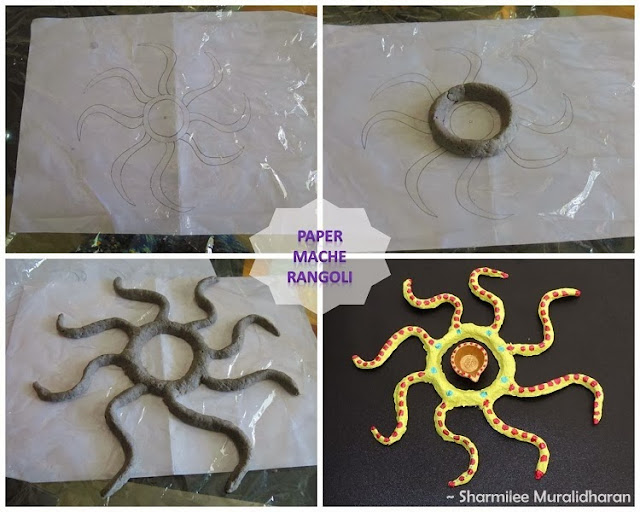
The picture is self explanatory on how the design was made. As a trial I chose some odd design with a circular shape in the center to keep a Diya. It took few days to dry. I guess lots of rangoli - to be assembled pieces can be made using this, which is as attractive as the kundan rangolis available in stores. Could be a fun activity for kids to make and assemble them as they wish.
Paper mache is such a great medium to work with and can be used to create anything right from miniatures to life size structures. One most important thing is the opportunity for recycling anything lying around at home, newspapers, cardboard, cereal boxes and the list goes on. So, how do you like my paper mache creation ? Please do leave me a comment.
About the crafter :
Sharmilee Muralidharan is a Chartered Accountant by profession and she works as a Management Consultant in her husband's consulting Company. She is an avid birdwatcher and nature lover. She has deep interests in recycling and eco-friendly concepts. She is from Chennai and is an active member of the ChennaiCrafters club.
Wednesday, September 19, 2012
The
truest testament to a DIY tutorial is when someone follows your instructions, improvises and comes out with their own project. When we posted the
complete guide to making a paper mache clay, I had few friends write to me about the how to process. One of them was
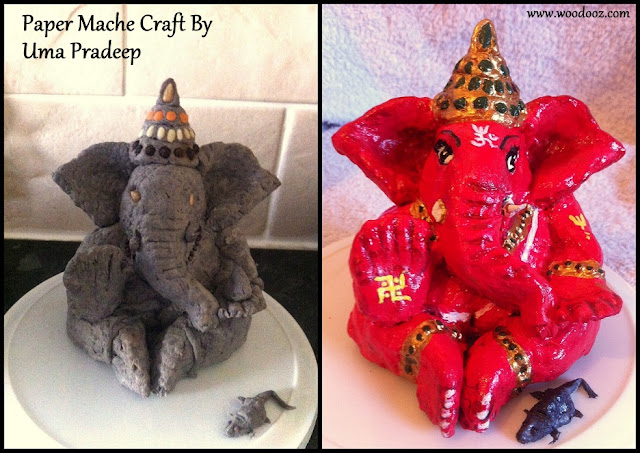
Uma Pradeep, who is a big follower of Woodooz. She had been telling me how much she wanted to make something out of paper mache, and finally managed to make this idol of Lord Ganesha at the most opportune time.
These pictures have come all the way from Edinburgh, Scotland and I shall let Uma tell you more about this project herself.
 |
| Make your own Ganesha idol for Ganesh Chathurthy |
First of all, this is something that was very effective in keeping my kids engaged for as long as we were making this idol. They were keenly looking forward to helping me with ripping the papers off.
I did some research after I was done with this, and found that the roughness in the outcome can be avoided if soft tissues are used instead of news papers. It takes time to dry and patience is very key.
I also found that it is better if the final product is dried using a hair drier for getting a better density. Small amounts (One spoon) of bleaching powder can be used on the idol after it is done to prevent formation of any moulds.
I used a base coat of poster paint and then layered it with three more coats of poster paint. The last coat was made with glossy poster paint.
I was only glad that I was able to complete this just in time for Ganesh Chathurthy. It is indeed quite a fun craft to work on and I intend to make more such stuff in some time. Of course, I also intend to apply my new learnings. Hope you like it. Do leave me a comment and let me know what you think.
 |
| Lord Ganesh with his little mouse |
We take a lot of pride in showcasing this post and work of Uma Pradeep. It is not so often that we have someone
expressing their thoughts on the utility value of this blog, and this is one of those moments. Hope you loved this post and project just as much as we did.
Remember to leave your comments. Also, Do let us know how your Ganesh Chathurthy celebrations went.
And here is a couple of Lord Ganesh DIY posts that we loved reading in the blog world.
About the crafter:
Uma Pradeep is a mother to two very active twins and gives vent to her busy schedule through her passion for painting. She is a
trained artist in Tanjore painting. She holds a full time job as a delivery manager with Accenture and lives in Edinburgh, Scotland.
If you liked this post, you will also like the other showcases :
Linking in : Colours Dekor,
ArtsyCraftsyMom
Monday, June 25, 2012
When I made my first paper mache craft in Woodooz, the process of making the paste was very brief that many found it not so handy. Since then there have been many online and offline requests and so I decided to make a descriptive post on how to make the paper mache clay. The
DIY nameboard and the
paper mache tribal masks were made using the very same process described below.
1. Materials Required
- News Paper strips
- Flour (Maida)
- Salt
2. Start with the paper
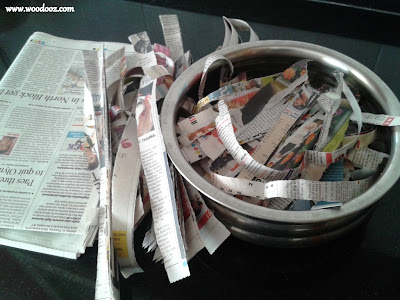
- Cut the news paper into small strips
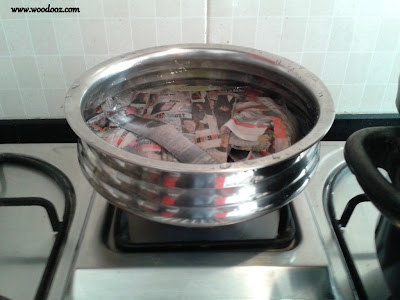
- Soak the strips in water. Allow it to be in water over night (Atleast about 8-10 hours)
- The strips should be completely soggy
- Alternatively, you can boil the strips in water to quicken the process
 |
| Cut the paper into strips |
 |
| Soak the strips in water and boil |
3. Grind the boiled strips
- Allow for the strips to be soaked in water (at least 30 mins) after boiling
- Take the strips and drain the water
- Grind the strips in a mixer
- The picture below is after the strips were ground
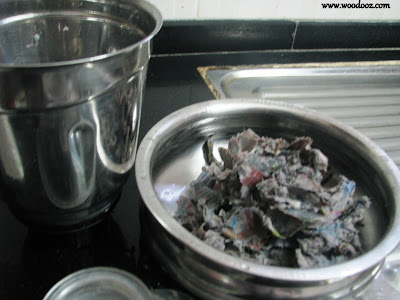 |
| Grind in mixer |
4. Add maida (flour)
- Slowly add maida and salt to the ground mix
- The need for maida is to provide the necessary consistency to convert the mix into a clay like paste
- Keep adding maida and salt as you knead the mixture until you get a dough (Chapathi) like consistency
- For this demonstration, I used two sheets of news paper and 250 grams of maida
- The key here is the dough like consistency and so you would know when to stop adding the maida
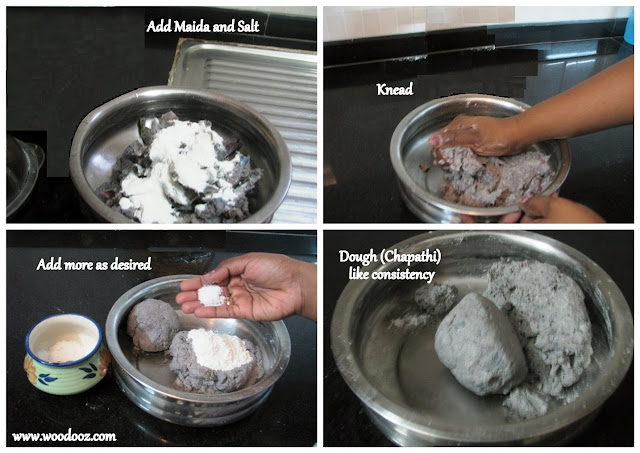 |
| How to make paper mache pulp |
5. Use the clay
- Once you reach the desired consistency, your clay is ready to use
- Lay it on a plastic sheet so that it does not get sticky
- Make the shapes that you want to make using the paper mache clay
- Allow it to dry for more than 24 hours
- Once dried the shape you have made is ready to be painted. Use an acrylic primer base if required
- Unleash your creativity and add colour to your paper mache project
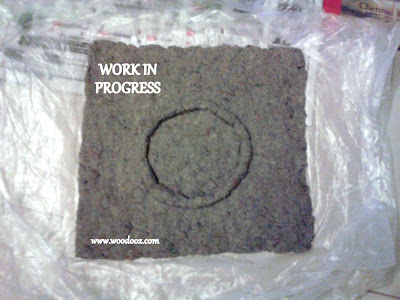 |
| Make your paper mache project |
Just ensure that you do not disturb your project while it is drying. Once dried, it becomes very strong and stiff. And so, that's how you make the paper mache paste. I have something in mind for this project which I shall save for another day after it is complete. For now, it is just work in progress.
Do leave me your comment and let me know if there is anything amiss. Let me know if you used a different method to make this clay. If you do use this tutorial and make your paper mache project, let me know. I would love to know how it turned out.
~ Preethi
If you liked this post, you may also like
Monday, June 11, 2012
Second in our series of
WOODOOZ SHOWCASE, we bring to you a craft project by
Subbu Padmanabhan. We once did two tribal face masks and then a
personalized name board using paper mache. Here’s a paper mache craft idea that
combines the faces and the name plate into one beautiful welcome board for the entrance.
Read more to know what Subbu has to say about her project, in her own words.
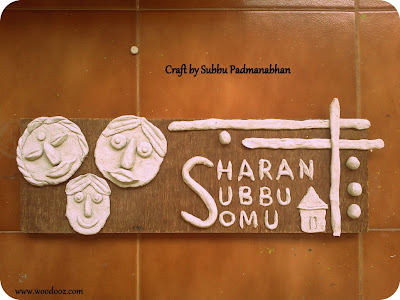
"I had a spare wooden plank and lots of time during my son’s summer vacation and wanted to use them resourcefully. One of the many things I made was this name board for my home in Bangalore.
I wanted to make a home, faces to represent the occupants of the home and then our names. Making the paper mache paste is easy and you can find a detailed step by step description of how Preethi made the paper mache paste here in Woodooz. One additional thing I did was add chalk paste putty when I ran short of flour."
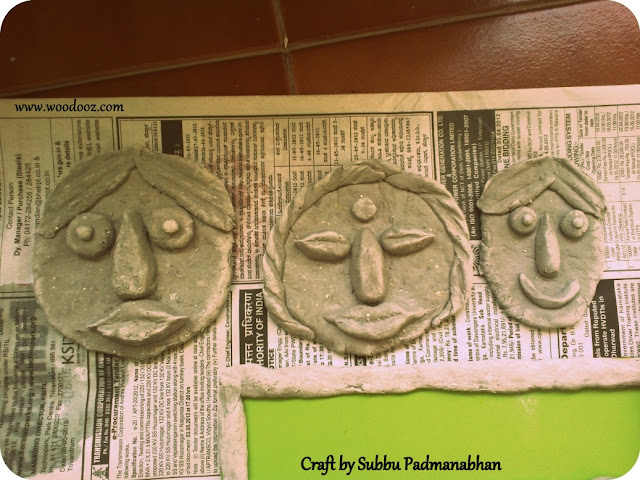 |
| Paper Mache faces |
"The grey color is because of the water in the mix. Once the figures are made, they need to be allowed to dry for a minimum of 24 hours before you can do anything with it. Once dried, it takes a lighter color with all the water drained off. I made the letters separately and then set it on the plank."
 |
| Arranged to be glued |
"Once I was happy with the arrangement, I set out to color the faces and the letters. I used acrylic colors to give the entire project some life."
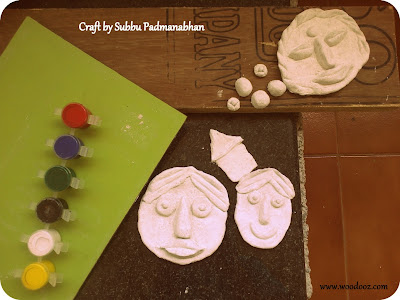 |
| Acrylic colors for painting |
"You can use acrylic primer as a base coat as it also allows for hiding the pores in the figures."
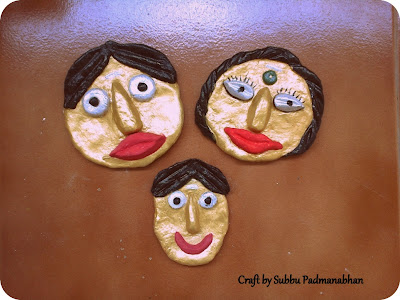 |
| Paper mache faces painted |
"Once the coloring was done, I used fevicol to stick everything onto the 6mm plywood plank. While you can use wood paint to prime and paint the wood I used acrylic color to give it uniform texture as the faces. I used gold predominantly to go well with the contrasting brown color of the backdrop. After giving the glue time to dry up, the plank was up on my entrance wall."
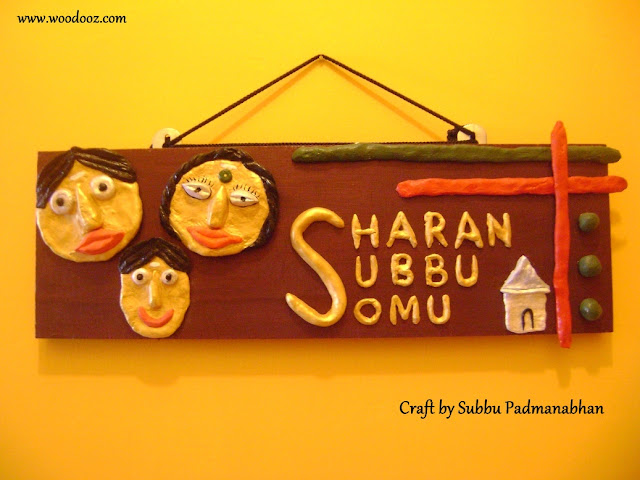 |
| DIY Paper Mache Craft |
"How do you like it? Do you think something is amiss ? Let me know your thoughts. Leave a comment."
By the way, her friends in the apartment loved the name plate so much that one of them wanted to learn how it was made and another wanted to custom make a plate similar to this one. Isn’t that wonderful ?
About the Artist
Subbu Padmanabhan is a mom to a 3 something year old boy, and works as faculty in a premier play school. She likes to indulge in mini crafts projects, for the school and her home, during her spare time. The wall art that you see in the backdrop of
this bedside lamp is her handiwork too. She lives in Bangalore.
You may also be interested in
Linking in :
Colours Dekor
- Somu
Friday, August 05, 2011
Paper mache traditionally has had many functional uses. It was used in
winnow baskets (Muram in tamil) for giving the cane frame a stronger and smoother finish. I also hear my grand mother used to make paper mache baskets for storing rice. For quite sometime now, it is an extensive medium for various crafts. With merely used paper as the raw material, you can make trays, pen / magazine holders, lamp shades, earrings, beverage coasters, toys, decorative items and much more if you unleash your imagination.
 |
| Paper Mache DIY |
The craft is not limited to only the smaller objects. We used to make 30 feet structures in our arts and decoration club in college. While making the paper mache mix warrants a separate, detailed post by itself, you can find a brief overview of how to make the paper mache mix from an earlier post of ours.
 |
| Paper Mache Name Board |
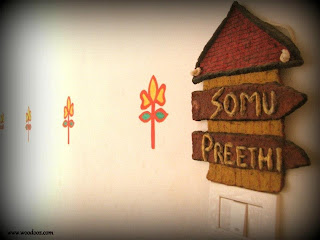
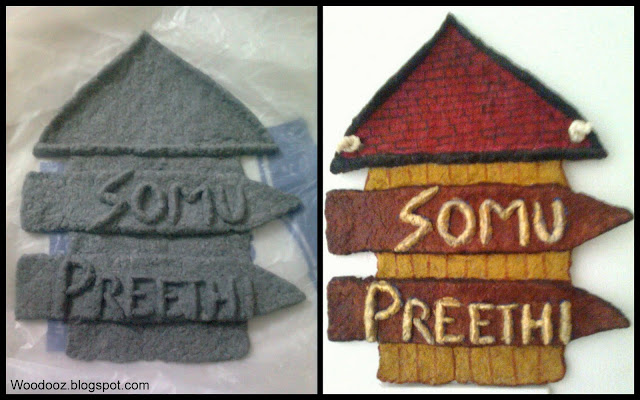
For this name board, the shape of the house was first made and then the letters, which were stuck to the backdrop. Paper and maida being the only base, you would be surprised at the strength the whole mix attains after drying, which takes about 2 days. You can use putty (Chalk powder) for a smoother finish, paint with your desired colours / design and give a coat of modpodge for protection. On the whole, a very lovely craft.
- Somu
Sunday, April 10, 2011
This DIY is a decorative project - Making indian tribal faces using paper mache. Thanks to my art club in college and Google. I had a fair idea of the
steps involved in making the paper mache clay.
One will need paper strips (I used old newspapers), flour (Maida), salt, water, paint (according to your choice). The first step involves soaking the paper strips in water over night. Alternately,
you could boil them to fasten the process. Drain the water, grind it, and slowly mix flour and salt. It takes atleast an hour to get the consistency.
Mix as much flour as required and knead it till it resembles clay.
 |
| Paper Mache Craft - Tribal Face Mask |
Our balcony garden is getting set and we wanted little things to fill it up. So I decided to make a couple of tribal face masks using the mixture. I couldn’t wait till it dried up to give the final touches.
It had to be left for close to 24 hrs to completely dry up. The result was a beautiful tribal couple.
While the masks I have made are more of a 2d,
one can use paper mache to create 3d shapes as well. We’d just need a frame (either some object or frame made out of flexible iron rods) and the mixture can be applied to get any desired shape. It was good fun and we plan to use paper mache for a lot of our future projects…
~ Preethi
You may also be interested in our other paper mache projects
- Somu


