When I made my first paper mache craft in Woodooz, the process of making the paste was very brief that many found it not so handy. Since then there have been many online and offline requests and so I decided to make a descriptive post on how to make the paper mache clay. The DIY nameboard and the paper mache tribal masks were made using the very same process described below.
1. Materials Required
- News Paper strips
- Flour (Maida)
- Salt
2. Start with the paper
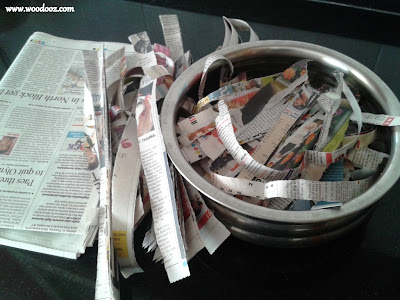
- Cut the news paper into small strips
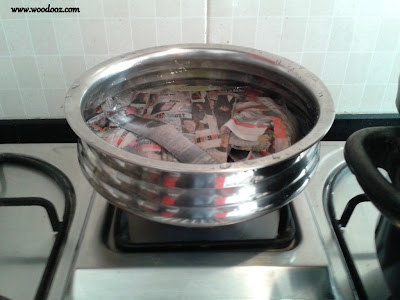
- Soak the strips in water. Allow it to be in water over night (Atleast about 8-10 hours)
- The strips should be completely soggy
- Alternatively, you can boil the strips in water to quicken the process
3. Grind the boiled strips
- Allow for the strips to be soaked in water (at least 30 mins) after boiling
- Take the strips and drain the water
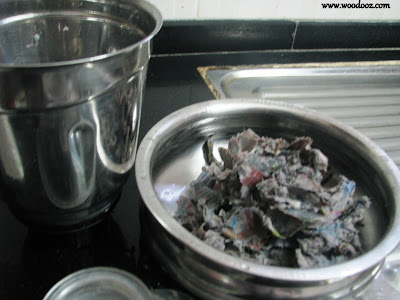
- Grind the strips in a mixer
- The picture below is after the strips were ground
 |
| Grind in mixer |
4. Add maida (flour)
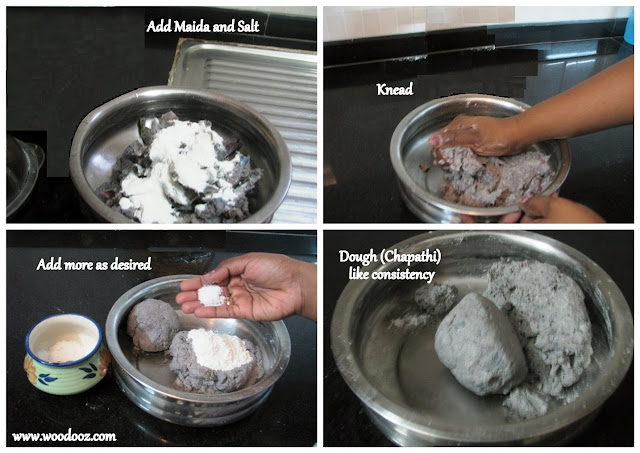
- Slowly add maida and salt to the ground mix
- The need for maida is to provide the necessary consistency to convert the mix into a clay like paste
- Keep adding maida and salt as you knead the mixture until you get a dough (Chapathi) like consistency
- For this demonstration, I used two sheets of news paper and 250 grams of maida
- The key here is the dough like consistency and so you would know when to stop adding the maida
 |
| How to make paper mache pulp |
5. Use the clay
- Once you reach the desired consistency, your clay is ready to use
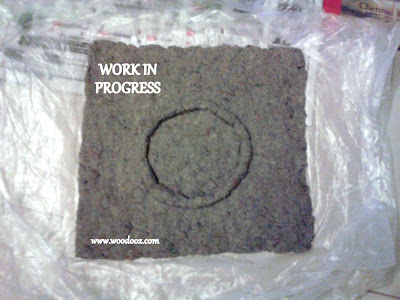
- Lay it on a plastic sheet so that it does not get sticky
- Make the shapes that you want to make using the paper mache clay
- Allow it to dry for more than 24 hours
- Once dried the shape you have made is ready to be painted. Use an acrylic primer base if required
- Unleash your creativity and add colour to your paper mache project
 |
| Make your paper mache project |
Just ensure that you do not disturb your project while it is drying. Once dried, it becomes very strong and stiff. And so, that's how you make the paper mache paste. I have something in mind for this project which I shall save for another day after it is complete. For now, it is just work in progress.
Do leave me your comment and let me know if there is anything amiss. Let me know if you used a different method to make this clay. If you do use this tutorial and make your paper mache project, let me know. I would love to know how it turned out.
Do leave me your comment and let me know if there is anything amiss. Let me know if you used a different method to make this clay. If you do use this tutorial and make your paper mache project, let me know. I would love to know how it turned out.
~ Preethi
If you liked this post, you may also like
- A paper mache project you will love to make
- Learn to baby proof your balcony all by yourself
- Here's how you can make Mod Podge from easily available Fevicol



As usual ..thank u for such a poniter based guides on paper mache :)
ReplyDeleteHi Aparna, as usual thanks for your comment. Always good to see a word or two from you.
DeleteReally appreciate this post. I plan on trying this summer. Thank you.
ReplyDeleteHi Calindgirl, thanks a lot... You should try it out and do let us know how it turned out. Paper mache really opens up avenues for exploring creativity.
DeleteI was searching for the proper tutorial for papermache ...thanks for sharing
ReplyDeleteHi Ranjana, glad that you found what you were looking for. Do let us know how it turns out. :) And thanks a lot for your comment.
DeleteThanks a lot Preethi for sharing this recipe, This is what I was searching for. Sure will share with u whatever I make.
ReplyDeleteThanks Disha. Please do share your work. We would love to know from others if the tutorial did work for them.
Deletesuperb dear..lovely space . Visit our place and pass on your words for us .
ReplyDeleteHi Shama, thanks a lot. Most certainly will drop in :)
Deletethanks for sharing! will definitely try this :)
ReplyDeleteHi Anon, thanks... Try and let us know.
DeleteI sooooooooooooooooooo needed this post... Its impressive.. I've always wanted to know how to work with paper mache.. and how to do it.. Lovely... Lovely.. Im inspired to try some of this next month.. when Im on my own.. :)
ReplyDeleteHi Patty, thanks a always. We wanted this post to be of purpose and am glad that you are inspired :) Will certainly look forward to your work sometime in Aug :)
DeleteCame via Patricia's link...thanks so much Patty! I'm going to be making some of this too! I've made some basic stuff before, soaking strips of paper in water and white glue mixture and putting it on a balloon, which when dry can be cut in half to make to bowls, and also by draping the paper on the back of a bowl to create the shape. But with this paste, there is much more creative stuff that can be made.
ReplyDeleteThanks for sharing.
Hi Shalini, I should thank Patricia for bringing you here. I have been looking for means to make shapes out of a balloon (for a lampshade) and everywhere I looked, I was told that I need to use corn starch. Since I wasn't sure where to find it, I dropped the idea. Now your little comment seems to have opened a big door for me. White glue mixture ? Now that is something I am going to try.
DeleteAnd as you mentioned, this paste is like clay and you can mould it to any shape you desire. And when it dries, it is really strong.
Thanks for visiting us and it would be a pleasure to have you keep coming back.
Very very informative .Thank you so much for sharing . God bless .
ReplyDeletei wanna make bangles of paper mache , can u plz expalin me procedure and with which color one should paint
ReplyDeleteThanks Somu & Preethi. I'm going to try this and let you know. Will make some creative shapes for my 2 Yrs kid using paper mache clay ,am sure she will enjoy :)
ReplyDeleteAmazing creativity, once again thanks for sharing this.
Great!!! I was looking for this recipe for long. Thanks a lot for sharing.
ReplyDeletenice tutorial
ReplyDeletethank you for sharing your idea..however, could you tell me what is the purpose of the salt
ReplyDeleteHi Nayena, first things first. Thanks a lot for dropping by and leaving your word of appreciation :) The salt acts as a preservative and prevents any molding from being formed. :)
DeleteHow much paper salt and flour would I need to make 7 maskes
ReplyDeleteAlso, is there anyway I could speed up the drying and hardening process?
ReplyDeletethanks a lot .instead of adding maida i use favicol or any other glue like fevicol. i did not add salt previosly as i did not know the purpose of adding salt, thank u for this information.I stay in kolkata . can u you suggest from where i'll get an acrylic primer base.
ReplyDeletethanking you
debashrita nag
very informative thanks
ReplyDeleteyou said 2 sheets of paper is it two complete papers?
Looks like a great recipe ! Thanks. Has anyone done any projects with this and if so can you post picts ? Especially for a Grand-Pa and His 6 and 4 yrs. old granddaughters. Thanks, Papa.
ReplyDeleteHi, Yes, there have been many projects done using this recipe. There are some that I have showcased in my blog. You can follow this link for some of the small projects (http://www.woodooz.com/search/label/Paper%20Mache). You can also google to get an understanding of what others have done using paper mache.
DeleteHi Somu,
ReplyDeleteI read your comment on Corn starch some time back, wanted to write abt a little i know. I guess it is same as the Corn flour we use in cooking. Though some say they are different, recently i noticed in the pack which says Corn flour/ Maize starch. I used corn flour instead of Maida, in one of my paper mache pulp - i liked the way the paper mache turned out to be - it is pure white too. Also to make the balloon - lamp shade - I just used the paper strip dipped in Maida+water+Fevicol+acrylic colour mix and applied it on the structure. It still in WIP, I cant wait to finish and show to you.
This comment has been removed by the author.
ReplyDeleteHello Somu..I just cant wait to work on the paper mache craft...I love the tutorial..Also I wish to make some lamp shades and Im looking for Lampshade metal frames or cardboard frames so that I can cover it with some fabric of my choice. Do You have some idea where can I find these. I live in Bangalore.
ReplyDeletePriya
How much salt should be used in it
ReplyDeleteI remember using multani-mitti instead of maida for making this during my school days. Nice tutorial.
ReplyDeleteHi, really not worked with multani-mitti... So not able to comment. And thanks a lot for your feedback on the tutorial. Really appreciate it :)
DeleteCan we use regular Aata (ground wheat powder) instead of Maida?
ReplyDeleteHi Firefly, I doubt it... You need something that has the gluing capability and maida will do more wonders :) Just wanted to know... Could you let me know how you landed up here ?
Deletethanks for sharing...will try it tonight.
ReplyDeleteHi,
ReplyDeleteI have one question related to it. i have seen videos on you-tube for creating mask, in which they use dry paper and a glue made of some flour. can you please share that method please.
I wanted to make navaratri golu dolls.i am not getting smooth dough of paper mache clay.so help me in how much to add maida and salt for how much paper
ReplyDeleteThanx for helping me out!!
ReplyDeleteVery informative . Thank you.
ReplyDeleteReally good recipe, very much useful to create so many things
ReplyDelete