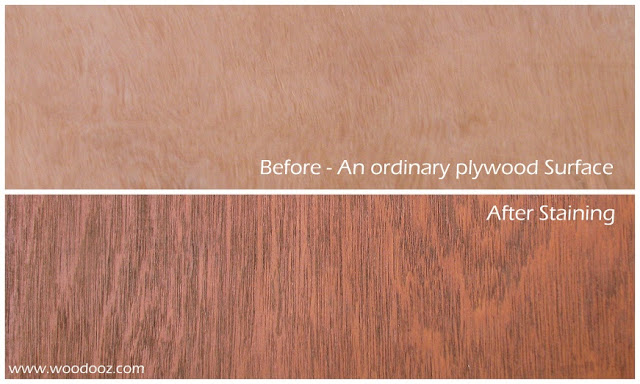
Category : wood stain


Over the last few months, we have been looking at the various preparatory steps involved in applying stain to wood. Today, we come to the conclusion of this series as we look at how to apply stain. While I have been mentioning this in most of my earlier posts, I would like to reiterate that stains help augment the grain patterns and give them a more enhanced look. If you landed here directly, do consider checking all the other posts in the staining series.
Complete guide to wood staining
Applying wood stain technique
How to apply stain
The application of stain is much like how we applied sealant in the last tutorial. The following are the materials required :
  • A bottle of stain (Asian paints / MRF / Wudfin / Sheenlac )
  • Gada Cloth
  • Thinner (If you need the color to be lighter)

Application procedure

  • Pour the stain into a bowl
  • Mix thinner only if you want the shade to be lighter
  • Dip the gada cloth in the bowl of stain
  • Dab it to squeeze the excess stain
  • Apply the stain along the grains covering a small area
  • Allow a minute or two for the stain to be absorbed by the wooden surface
  • Before the stain is dry, wipe of the excess stain off the surface (using a dry piece of gada cloth)
Applying wood stain - How to
How to apply wood stain
  • Repeat the procedure until you have covered the entire surface area of the wood
  • Give it about 30 minutes drying time before you apply the subsequent coats
  • Apply multiple coats as desired
  • Remember to apply varnish or other top coats for long term durability
And that is about it. Just one thing though. Much like any other activity, achieving perfection in staining takes lot of patience and practice. You may probably not get it the first time. But it is not rocket science and with little repeat effort, you will be happy with what you can do to your small furniture and other craft projects.

Follow these steps and let me know how you fared in staining. If you think I missed something or something can be done in a better way, leave me your comments.
Linking in : Colours Dekor


In one of the previous posts, we did look at an introduction to wood stains, the different brands available, cost and the basic application procedures. From this post on, we will look at, in detail, how to approach applying wood stains to your wooden substrate. We will delve into the various materials and supplies required, surface preparation techniques, the actual application procedure of stain and the top coat.
Complete guide to wood staining

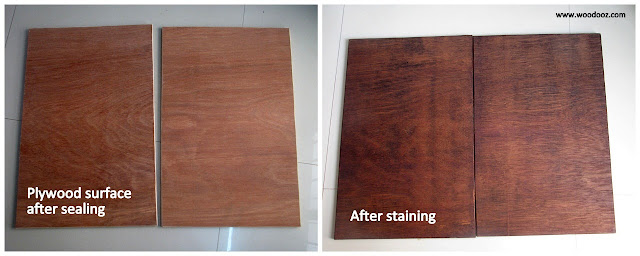
For the purpose of demonstration, I will use a spare sheet of One Side Teak. I will use both sides of the sheet to lay bare how stains work and enhance the look of the substrate.
Staining wood tutorial
How to stain wood - A beginner's guide
The following are the topics that I will discuss in detail in the forthcoming posts. Each of these steps is important and critical to the effectiveness of the staining process.
  • Step 1 : Sanding the wooden surface
  • Step 2 : Understanding sealers and why they are required
  • Step 3 : Applying Sealer as a pre-conditioner
  • Step 4 : Applying the wood stain
  • Step 5 : Applying a top coat (Varnish)

Materials / Supplies required

  • Sand papers (Grit 80, 100, 120, 150, 220)
  • Muslin cloth (Ask for Gada Thuni if you are in Chennai) 1 meter
  • Thinner 500ml
  • Sanding Sealer 500 ml
  • Wood stain 100ml
  • Rag Cloth
  • Wood Polish 
The details of the brands, cost etc… , I shall discuss in the individual posts.

Wood staining in India
Materials required for staining wood

Some safety precautions

  • Using a mask is mandatory. Sanding can send in dust particles and staining can send strong fumes through your nostrils.
  • Cover your eyes to protect from the dust irritating your eyes.
  • Use gloves because it is very difficult to remove stain off your fingers.
  • Work in an open, well ventilated space
That said, shall come back and take you through each of these individual steps in the coming days / weeks. Meanwhile, do remember to leave a comment and enter your e-mail address below just so you do not miss the rest of the posts in this series.

- Somu


Ever wondered how the dull and boring surface of an ordinary plywood can be made vibrant with colours that enhance the surface patterns ? Enter Wood stains (Click on link for the beginner's guide to using wood stains). Wood stains are finishing media that allow for adding color to a wooden substrate. Staining the wood results in the wooden grains / patterns being enhanced resulting in a finish appealing to the eyes. Now, wood stains is a topic that I have been deliberately avoiding because of my inadequacy in the skill. However, over the last few years, I believe that I have gained enough practice and expertise to discuss it here.
Complete guide to wood staining
Walnut wood stain
Wood stain - Before and After
The surface preparation required and the method of stain application may make the whole staining process look very complicated. The idea behind this post and the subsequent posts (COMING UP) is to detail the process of staining for all to benefit. This will be a series of 5-6 posts explaining the individual steps involved in achieving the desired look using stains.

Wood Stains in India

I don’t claim to be an expert and I am not offering to elaborate on all the different types of stains that are there in the market. This blog is brand agnostic, and so am not endorsing any particular brand either. Following are some of the Wood stains that I have worked and have seen fulfilling results with.
  • Asian Paints
  • Wudfin (by Pidilite)
  • MRF Wood Stains
  • Sheenlac
All these stains come in a 100 ml bottle and will cost anywhere between Rs.33-Rs.40/-.
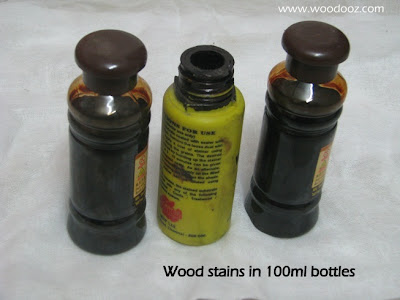
Wood Stains available in India
Different wood stains - 100 ml bottles

Colour options in Wood Stains

Wood stains come in various colors that suits your needs. These are available in most hardware stores that also sell paints. Unfortunately, not all colours may be available at the local store as they stock only fast moving colours. The following is the shade range that I picked from the MRF Paints website. Other brands also have similar colour ranges.

Wood Stain colour options
Wood Stain colour ranges
Image Courtesy : MRF Paints

Stained Wood Finish

As I mentioned earlier, the stained finish will enhance the wooden patterns on the surface and make the grains noticeable more prominently. Unlike in paints, where the surface finish is one uniform opaque layer, stains will make the surface grains visible. Stained finish is certainly my favorite and I have shown few projects below that I did using wood stain.
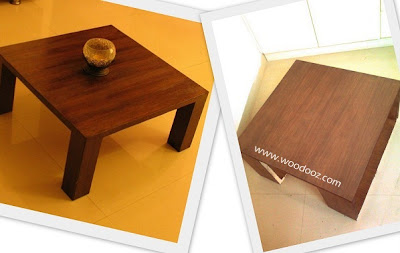
Stain wood finish
Stained wood look

Application procedure

Though I am going to elaborate each of the steps involved in staining wood in individual posts, it makes sense to mention the steps involved in staining wood:
  • Sanding. Stains fill the grains and other dents in the wooden surface giving it a different color. And so this becomes a very important step. Staining requires a very smooth surface
  • Sealing. Sealants prevent uneven distribution of the stain and helps in achieving a uniform color across the surface
  • Staining
  • Varnishing
While there are certainly other types of wood stains, I have only mentioned those that I have worked with. The composition of these stains is beyond the scope of my understanding. That said, I should warn you that working with sealants and stains may result in inhalation of fumes and hence warrants the need to follow safety precautions. 

More later in the subsequent posts. Meanwhile, do leave a comment and let me know if there is anything specific you need me to cover in this series.
- Somu

Know more about us

About Us
Reviews
Media
Our showroom location
Return and refund policy
Review us on Google

Connect with us


Mail us
Subscribe to our newsletter

Our Address :
Woodooz Home Decors,
3/371, First floor,
Metukuppam, Thoraipakkam,
Old Mahabalipuram Road (OMR),
Chennai - 600097.
Ph : +91 9884070470
Email : contact@woodooz.com
Created By SoraTemplates & MyBloggerThemes