
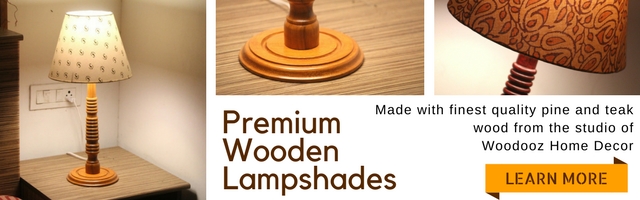
Over the last few months, we have been looking at the various preparatory steps involved in applying stain to wood. Today, we come to the conclusion of this series as we look at how to apply stain. While I have been mentioning this in most of my earlier posts, I would like to reiterate that stains help augment the grain patterns and give them a more enhanced look. If you landed here directly, do consider checking all the other posts in the staining series.
The application of stain is much like how we applied sealant in the last tutorial. The following are the materials required :
| Complete guide to wood staining
|
 |
| How to apply stain |
- A bottle of stain (Asian paints / MRF / Wudfin / Sheenlac )
- Gada Cloth
- Thinner (If you need the color to be lighter)
Application procedure
- Pour the stain into a bowl
- Mix thinner only if you want the shade to be lighter
- Dip the gada cloth in the bowl of stain
- Dab it to squeeze the excess stain
- Apply the stain along the grains covering a small area
- Allow a minute or two for the stain to be absorbed by the wooden surface
- Before the stain is dry, wipe of the excess stain off the surface (using a dry piece of gada cloth)
 |
| How to apply wood stain |
- Repeat the procedure until you have covered the entire surface area of the wood
- Give it about 30 minutes drying time before you apply the subsequent coats
- Apply multiple coats as desired
- Remember to apply varnish or other top coats for long term durability
Follow these steps and let me know how you fared in staining. If you think I missed something or something can be done in a better way, leave me your comments.
Linking in : Colours Dekor


Many thanks. I enjoyed reading.
ReplyDeleteYou made it so simple for us(me).
do you have another post on the brands and the price ?
you also did not mention but about varnishing. please share some tips on this last step in staining.
Hi Emmanuel, thanks for the feedback. Happy that it makes things easy for you, which is the objective of the post.
DeleteI did cover a little bit about brands and cost on this post -> http://www.woodooz.com/2013/02/introduction-to-wood-stains-in-india.html. Do see if it helps.
Time is becoming a factor which is why am not able to make posts like before. Certainly putting up one for Varnishing is in the pipeline. Thanks for dropping by. Will look forward to seeing here again.
Woow nice to see Indian woodworking blog. I read your above blog on stains and i feel Sometimes using natural base filler can make your job easy is application consistency is perfect. In that case stain application might be easy. what do you think?
ReplyDeleteHi P, thanks for your comment on the blog. True that having a base filler can make the job easier. I did not want to add the additional step from a convenience stand point. Without the filler, the little grain ridges are visible, and that looks good in its own way too. Thanks for visiting us and do keep coming back :)
DeleteHi Somu and Preethi,
ReplyDeleteGreat to finally see an Indian woodworking site....I have just started working on upcycling one of my old tables and wanted to give it a vintage look....I have gone through a lot of international sites, which give beautiful descriptors but the stuff they use are not available. I would like to know what are the products available here, which can be used to give such a look.
Pls. guide.
Ranu
Hi Ranu, we have the list of products that we use listed in the post. Please do check if that helps. You can get all of these from the local hardware store. :) Thanks for your comment and happy DIYing.
DeleteExcellent articles in the web, good job for DIY projects. I am also an DIY hobbyist.
ReplyDeleteAbhinay Gupta
Great post and website. I think it is timely that DIY becomes more prevalent in India, and your site is an excellent way to make this happen. Good luck and keep up the good work :)
ReplyDeleteNice work.
ReplyDeleteYou could have gotten a bit more into the details for a beginner, but for some one who knows what he is doing, its an awesome post.
Keep it up.
What is mean PU wood polish , what is this helpful in polish.
ReplyDeleteNot relevant perhaps directly but will allow for n00bs to pick up wood FUNiture and start experimenting for a very low price.I have been following Somu and Woodooz for ages and have learnt how to sand n stain here. We recently launched a site called www.uByld.com which retails DIY woodworking kits made of pine. Have a look, would love to hear the opinion from experts here on maker@ubyld.com . Regards Denzil
ReplyDeleteThanks for the detailed tutorial.
ReplyDeleteBut where do you use the wood polish (white color bottle) that you showed in the first post ?
Purchasing furniture for youngsters can be a significant troublesome activity.computer desk chair
ReplyDeleteSuper site! I am Loving it!! Will return once more, Im taking your food additionally, Thanks. Roblox Download Android Version for free
ReplyDeleteI think it could be more general if you get a football sports activity Tubidy APK 2020 Download Free Latest and Update
ReplyDeletecan we mix the stains together to acheive a desired look like redbrown and walnut
ReplyDeleteThe vast majority that are considering putting resources into outside furniture understand that in a couple of years they will do this once more in light of the fact that most items essentially don't charge well when presented to the components can buy ipe wood here
ReplyDelete