Category : battery case


This DIY project started off as a requirement for an inverter battery case. The need was to make something that will blend in with the rest of the living room furniture and so we decided to do a side table / cabinet that will hide the out of place battery and the stabilizer. Though I started off with a very simple design  it took me close to 6-7 months to really start putting the effort to build it. Decided to pose with it to give you an idea on the size of this cabinet.
Indian DIY
Do it yourself - Side table 
While I shall come back and put up a detailed post on how this can be effectively built by you too, I was a little impatient and wanted to show off the finished product here. I will leave you, for the moment, with  some work in progress photos.
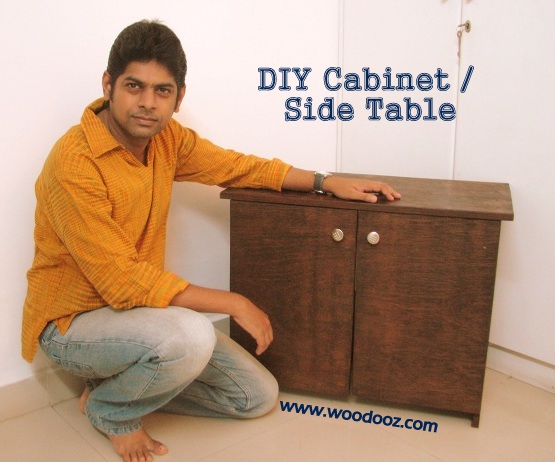
DIY Cabinet
The making of a DIY Side table / Cabinet
While I have all along been used to working with one side teak, this time around I decided to apply the finish directly on the plywood. This is something I had not done before and so I was a little skeptical. That said, I should accept that the outcome was quite satisfactory. If you have been following our "How to stain wood" series in Woodooz, you would understand how the  finish for this cabinet was achieved. 

I used European cup hinges for the cabinet door. The installation procedure for a cabinet door using cup hinges has earlier been documented in this blog. I chose a very simple pair of knobs from the local store for the door. Work is still in progress as I need to apply the final coat of varnish and also install a shelf to hold the stabilizer.
Woodworking DIY
Battery Cabinet
Meanwhile, do let me know how this cabinet has turned out. Do you think I should have done some things differently ? Share your feedback.

- Somu
Linking in : Colours Dekor


The requirement

What I like about the DIY projects I am getting is the variety in the requirements and the purpose that they are meeting. My recent assignment is to build an inverter battery case that will house the heavy battery and the inverter stabilizer. Considering the inverter is in the living room, the need was to build a cabinet around the whole thing which will look neat and can double up as a small side table.
Battery and stabilizer
The inverter

Making the trolley - Phase 1

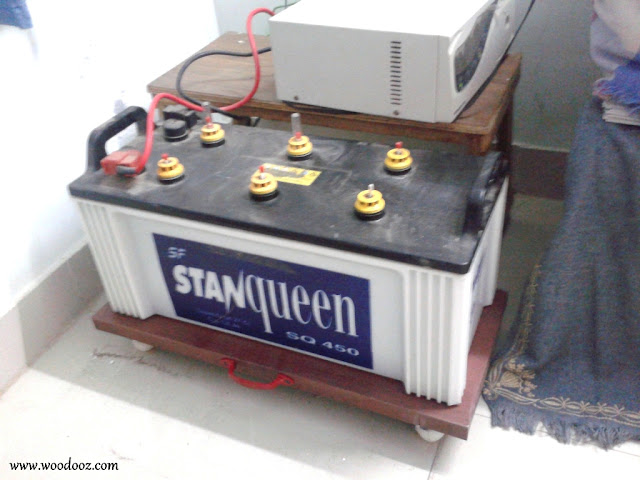
One constraint though. The battery needs to be fed with water at least once every two months. So an enclosed cabinet will not serve the purpose. Either the cabinet should open up to expose the battery or the battery should easily move in and out. I went with the latter option and decided to place the battery on a trolley.

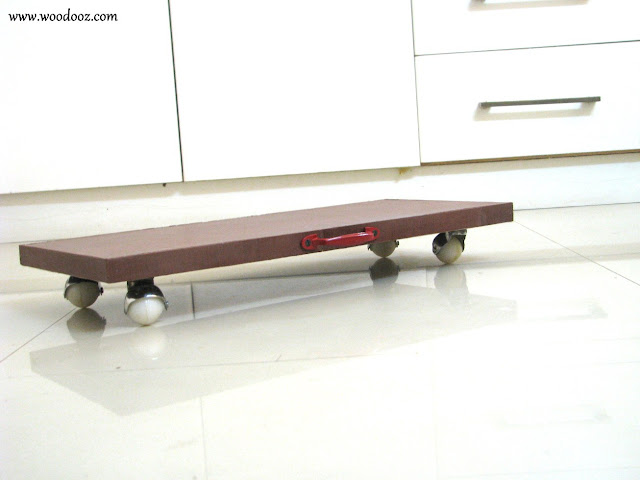
The first phase of the project was to build the trolley. I used 19mm plywood board for the trolley and had wooden laminate installed around it. I installed trolley wheels beneath the board and also had a door handle screwed in. The handle is to aid in pulling the trolley out of its enclosure. I tried using it as a skate board for sometime and ended falling flat.

Plywood with edge beading
19mm Plywood plank

Battery trolley
The trolley
Yesterday, I had the trolley delivered and installed. The dimensions ended up being perfect and it was really easy to pull the battery around.

Installation of the trolley
Battery on the trolley

Making the cabinet - Phase II


Cabinet design in #D
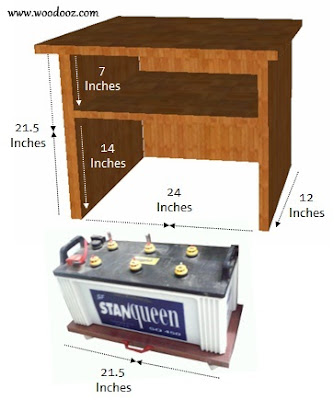
Tentative design and measurements
I have to now build the cabinet around the battery. Since the trolley needs to move in and out, decided to not have any base for the cabinet. It will have one additional shelf to house the stabilizer and will have doors covering the front of the cabinet. While the doors will hide the inverter, they will also have sufficient ventilation to allow for any smoke to sneak out. Adequate ventilation also needs to exist in the sides and rear.

This 3D design that I created using sketchup is very simple and tentative. Once approved I will be starting work on Phase II.

Most countries and states may not understand the need for inverters in the house. But, with daily power cuts being the norm in Chennai, almost every household has one. Do you have one too installed in your home ? How have you covered it up? There are ready made cases available. What did you go for ?

- Somu
Did you like this post ? Enter your E-mail address and join our growing E-mail list


If you liked this, you may also like

Know more about us

About Us
Reviews
Media
Our showroom location
Return and refund policy
Review us on Google

Connect with us


Mail us
Subscribe to our newsletter

Our Address :
Woodooz Home Decors,
3/371, First floor,
Metukuppam, Thoraipakkam,
Old Mahabalipuram Road (OMR),
Chennai - 600097.
Ph : +91 9884070470
Email : contact@woodooz.com
Created By SoraTemplates & MyBloggerThemes