- Do you prefer a designated space for your phone ?
- Do you find it hard to hold your phone while watching a video on Youtube ?
- Do you place the phone face up on the table and barely hear your alarm because the speaker is in the rear ?
- Like me, do you get into the habit of looking for your phone under the couch, under the pillow, or in the balcony, because you don't know where you kept it ?
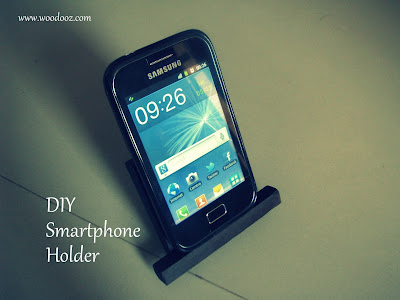
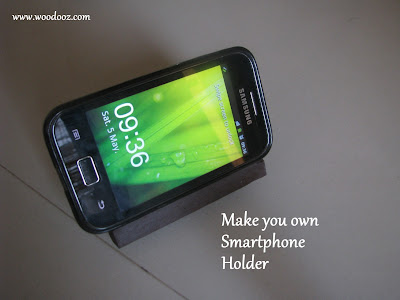
Here's an easy to do Smartphone holder that you can build yourself to keep your phone safely in one place. Remember the over-sized mobile phone charger holder that didn't need any nailing down ? This time I wanted to make a right-sized holder for my smartphone.
 |
| DIY Smartphone Holder / Stand |
 |
 |
| Make your own smartphone holder |
 |
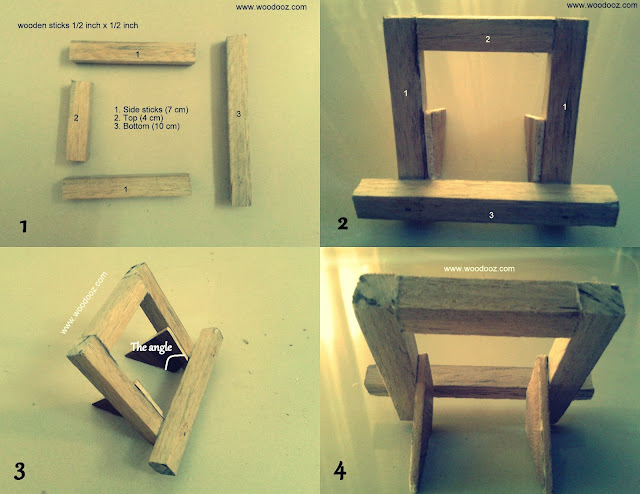
Materials Required - Picture 1
- I used 1/2 inch x 1/2 inch sticks (The same sticks that I used for this bedside lampshade base)
- Used wooden board (4mm) for the supporting rear (You can also use thick card or cork board)
Cut and glue the sticks together - Picture 2
- Cut the sticks to your required dimensions. The dimensions should be such that it should be able to hold the phone vertically and horizontally
- Glue them together. Notice how stick 2 is in line with sticks 1, while the base (stick 3) that will hold your phone is glued on top of the side sticks ?
 |
| Smartphone holder - Do it yourself |
 |
Make the triangular rear support - Picture 3
- Cut a triangle out of the card board and stick on the inner sides of sticks 1
- This board will support the holder while it is leaning backwards. The backward lean is required to prevent the phone from slipping off.
- The angle of the backward lean is decided by the angle between the two inner sides of the triangle.
Make sure your speaker is not hidden - Picture 4
- Make sure the dimensions of the sticks are such that they do not hide the speaker when the phone is placed on the holder.
- So, here it is, a smartphone holder for less than Rs.10. Yeah, really. Less than Rs.10
- Paint, stain or do whatever you want to give your holder color.
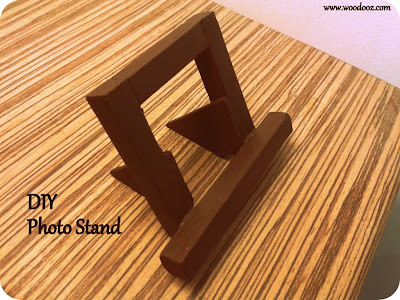
You can also additionally use it as photo holder, or greeting card holder. Works out to be a neat alternative to DIY photo frames.
So, how did you like this simple DIY? Where do you place your Smartphones? Much like me, are you just as careless and never bother about how you handle your phones ? Leave a comment.
 |
| Photo stand DIY - Place your photos on the base :) |
 |
Subscribe to our RSS feed. It is just a click away
If you liked this DIY tip, you may also be interested in our other posts :
- Make your own Photo frame
- Custom made wall clock. Check how you can make one.
- Personalized name board using Paper Mache
- Wooden laminates - Install them yourself
Linking in : Colours Dekor, Made with Love Party
- Somu


So cool,,,
ReplyDeleteHi Notyet, Thanks a lot :)
DeleteNice one !
ReplyDeleteHi Vinay, thanks a lot :)
Deletecreative :)
ReplyDeleteHi Aparna :) Thanks as always
DeleteHi Somu, Have started following your blog recently. I am an armchair aspirant(always think .. never get around to building anything) .. so already in awe that one can make such nifty little things .. would it be a good idea to also include which all tools did you use for making a particular thing .. much like the recipe in a cook book. It will help people like me to know why your creation has good finish and joints etc.
ReplyDeleteThanks
-MS
Hi MS, thanks for your kind words. It is comments like these that keeps me going here.
DeleteThe idea of my DIY post is to share how I do things and maybe in the process aid someone interested in doing so too. I am still experimenting to see how best I can present to make the content more purposeful. However, if the post is lacking inputs that might otherwise be useful, then the purpose is lost. In that perspective, your feedback is indeed a very good idea.
Most times, I am divided between - "Am I giving redundant information" and "Am I giving less inputs". I tend to leave out information if that detail is available elsewhere in the blog. Like in the case of this photoframe where I have used the same wooden sticks as that of the smartphone holder. But then to assume that someone might have also read the other post and be able to relate is not right. Maybe I will put a post dedicated to the raw materials I use along with the tools I use for them and point to it everytime there is a need to elaborate.
I am just wondering. What do you think ? Elaborate on every post ? Or have a pointer to a master post whenever there is a need ? Either way, let me know. It would most certainly be very useful for my upcoming posts.
Thanks again:)
Hi Somu, Indeed it can be a tricky decision: put obvious things in each post and seasoned readers will tend to be put off .. leave small things and people who are trying to go from idea to implementation using your posts will be lost.
DeleteInstead of one big master post, maybe there could be dedicated, separate (even if small) posts for individual steps like joints and how you made them line up at 90 degrees (probably already exists), how to do sanding/finishing .. and then when you write a new post, you can provide in-line links to these steps. Seasoned readers can simply skip while amateurs can follow them to find the finer details.
Thanks. - MS.
Hi MS, thanks for the suggestion... Let me look at your feedback and see how I can make my next post comprehensive... This is probably the first time I am getting such a feedback on my DIY posts... Thanks much ! :)
DeleteBtw, I do not use any fancy joints... and use only hand tools which is why it should be easy for everyone to do :) but let me make sure I cover aspects as to how I make my projects.
Somu- U rock!
ReplyDeleteThanks... But who is this ? :)
DeleteHi Somu,
ReplyDeleteExcellent work!!!
Hello Akka, thanks...
DeleteOh my!! thats very creative.. Its rather cool to give as a gift too..
ReplyDeleteHi Patricia, thanks... You are right, it would be a nice gift to give someone. :)
Deletekool idea.. I was searching for a mobile stand online and all cost more than 100 bucks.. this is so easy to make and cheap too.. thanks a bunch and keep posting more such kool ideas..
ReplyDeleteCheers, Nidhish
The phone holder looks great which you created. There is also one more way to make a stand for your phone in any desired shape and size by using a product called formcard as mentioned here > http://www.giftick.com/raj/100/. Formcard can be melted once placed into hot water and then it becomes like a clay to mould it into different shapes. After creating the desired shape (of a stand) let it cool and it will harden within just 5-10 min and you are then ready to use your created stand. But it will be a stand made of plastic and not wood.
ReplyDeleteIn any case, one key thing that you need to comprehend is that repairing a cell phone requires some specialized abilities and bunches of tolerance. Handy reparatur
ReplyDelete