Category : Lamp Shade


I have this bad practice of deferring things. If something can be done tomorrow, I would rather not put that effort today. So bad this habit of mine is, that it took me 7 months to complete a project that would have otherwise taken 2 days of dedicated work. Don’t know if it was lack of motivation, but I certainly found every bit reason to tell myself, “Hey, enough for today. Let me do this tomorrow”. And that tomorrow eventually arrived yesterday.

I had to commission a floor lamp for my aunt and the only specification was the feature wall backdrop. Finally after months and months of delaying, I managed to complete the lamp shade and deliver it.
DIY Lampshade
DIY Lampshade
For the base of the lamp shade, I stuck to a very basic design that I have earlier done. The 6mm thick plywood beading was just perfect for what I needed to build. The top of the base has an inset on which the lamp shade frame would comfortably sit. 

Base for the frame
Lamp shade base built using plywood edge bands
The lamp shade frame was also built using the beading sticks. You can see the skeletal frame in the inset of the below photo. I personally feel these plywood beadings have more purpose and functionalities than just being used as beadings. If only we can wrack our brains and let creativity take over, there is so much more that can be made with these otherwise simple and seemingly useless materials. We instantly fell in love with a nice fabric that we thought would be in right contrast to the dark backdrop.  

As for the shade design, I broke the monotony by introducing a section in the middle that would split the height of the shade.  This was something we were skeptical about right from the beginning, but feel it was worth it in the end. What is your take ?

Beautiful pink floor lamp
Fabric wrapped around the wooden frame
The increasing challenge that am facing of late in making shades is that am not getting ample supply of the required bulb holders. Either because am in a very remote part of the city or because there is no much demand for it. The last time I went to the electrical store, I brought home all of the supplies that he had. Here’s a top view of the lamp shade. 

My suggestion : Use CFL lamps as they are warmer and give a very pleasant effect.

Bulb Holder
Top view of the lampshade - bulb holder  fixed in the center
And finally, the lit effect. We are absolutely loving the outcome. Notice how light is getting distributed in the middle ! Well, it is easy for us to love our work. Do you like it too ? Let me know. If there is anything that needs change, what would be it ? Let me know your thoughts.

Lamp shade when lit
The lovely effect when the lampshade is lit

Do it yourself lamp shade
DIY Lampshade
I hope to continue with more such projects in the future. For some reason, I soooo love making lamp shades. The color, the vibrancy, and the charm around ambient lights is so remarkable that making one has such a fulfilling effect on me.  

And now your turn : How do you feel about making something from the scratch that someone else is putting to really good use ?


DIY Woodworking is a trend that is catching up in India. I have written about my views on Woodworking in India and the myths around it  in Woodooz before. Earlier last month, I had the wonderful opportunity to speak to Monty Majeed of The Week – Smart Life on my opinion on DIY. To my surprise, the article was published this month which also featured fellow DIYers Indranil and Sudhakar. Considering the article is in the current month’s edition, I will wait until May (and also seek permission) before I can share the entire article in Woodooz. However, wanted to put the news here and share this proud moment with all of you.

Meanwhile, we had been reworking on an earlier Lampshade that we had built for the home and were very happy with how it turned out. 
Our new lampshade on the floor
The original lampshade was the one that we built at the very beginning when we started Woodooz. It was our second project and that makes it a very very personal one. Three years have gone and as you can see from the below picture, it needed to be changed.
The old one and the new one
As they say, practice leads to perfection. At least in this case, I am seeing a drastic improvement from how it looked and felt earlier, and how it is now. The frame we built now is stronger and the materials we used are of higher quality leading to a sturdier finish. Right from how it feels to the touch to how it looks to the eyes, the improvised version is 100 times better than the old one. Or should I just say, it looks absolutely professional. Happy for both the news and the improvement that we are seeing with every new project of ours.
Lamp Shade DIY
And don't let the photo fool you. The bleach that you see where the light is placed is a result of my poor photography skill. The shade looks absolutely warm and pleasing to the eyes with the light on. Now, this is  is going to adorn our living room for another few years. With all the improvements that have come into this project, I am all excited about the next few projects which incidentally are also lampshades. Hopefully, should be able to complete them quick. Meanwhile, do leave us your comments which probably is the only motivation that keeps us going.


When the Chennai Crafters group decided to meet up, all of us wanted it to be one fruitful gathering besides  meeting up and discussing various crafts. And so when the admin suggested that we do a demonstration of one of the Woodooz products, we were quick to grab the opportunity. The lampshade was our natural choice for four reasons :
  1. It did not require complicated woodworking skills, expensive materials or any major tools
  2. It is relatively easier to demonstrate than the other products that we have here
  3. It is something everyone can go back home and try
  4. Light and color, we thought, would be appealing and interesting to everyone
Easy Lampshade DIY
DIY Lampshade
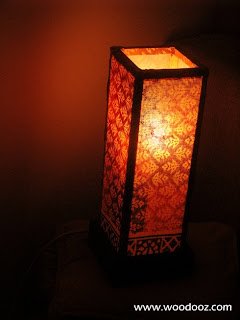
We decided to make a small (31 cm in height and 11 cm width), simple and yet a very colorful shade - something similar to the bedside lampshade that we made earlier. Red and orange with a green patterned border is what we finalized on. We also wanted to keep the base very simple, and used 19mm plywood edge banding sticks to build it.

We somehow did not bother to capture the step by step details of this shade because we were racing against time to be fully prepared for the demonstration. To save time, we had pre-built the frame and the base much before the actual demo.

Home-made lampshade
Handmade lampshade
Somu during the demo
We had just enough time to show how the fabric was wrapped around the frame.  What you see above (without the the light and after it is lit) is what we eventually came up with. Sooner or later, we certainly shall share the details on how the whole thing was built. For now, just going to leave you with the end product. Blame it on our photography skills, the photo below is not doing justice to how the shade really looks when lit. Nonetheless, do let us know how you like it.

We are happy that the shade was picked up by someone instantly after they saw what they saw. Certainly a boost to the efforts that we put into building this one. Leave us a comment. It is the much needed motivation for us in this online world.


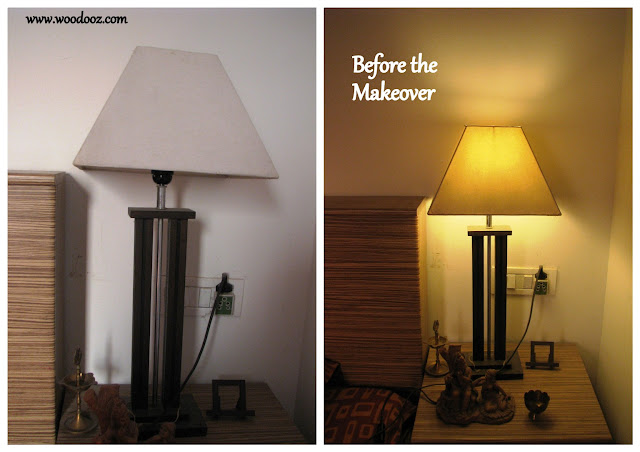
A plain white lampshade is like an empty canvas. You make what you want to make out of it. I received this really nice table lamp as a wedding gift and have long been wanting to give it some color. If you have been reading our blog, you would by now know how much we love making our own DIY lampshades. And so, I wanted to do something about a lampshade that didn't have the Woodooz stamp.

Before the makeover

The shade was made of plain white cotton fabric and that made it much easier for me. I wanted this to be a really short and easy effort like the 15 minute lampshade DIY and so went with a very simple design.
Lampshade before the makeover
Lampshade - Before the makeover

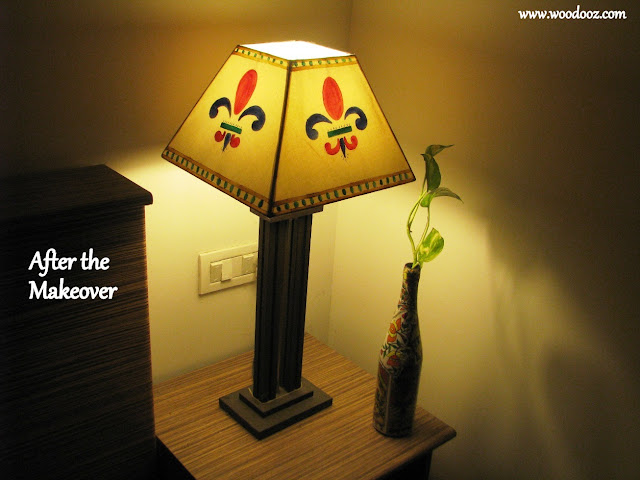
After the Makeover

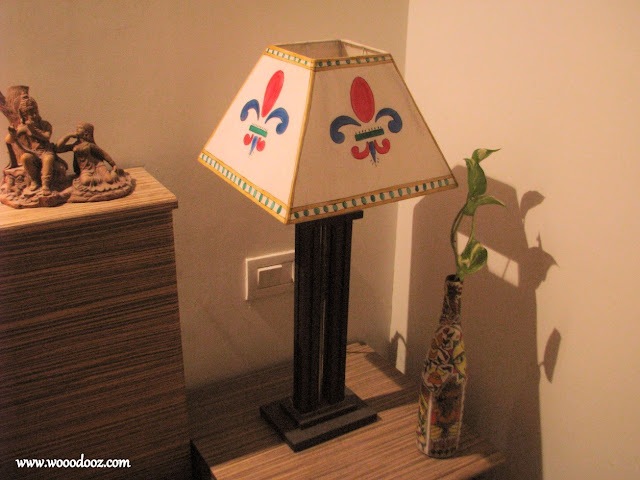
I used acrylic colors to fill the design and so, this is how it ended up looking. I am still undecided about the amount of white space in the shade. For now, I loved the simplicity of it and thought will add more designs and colors later.  I used all the primary colors just so it enables me to play around with the bedspread and the curtain colors in the future.

Lampshade - After the makeover
Lampshade Makeover DIY

Lampshade DIY
After the makeover
Let me know what you think ? Do you think I should have added more elements ? Please leave your comments and make my day. While you do that, I would also request you to join us on our Facebook page. Somu and I promise not to spam your wall.

~ Preethi


Have you read our other Lampshade posts ? 

Linking in : Colours Dekor
- Somu


So, we were cleaning up stuff and were wondering what to do with the leftover fabric of the earlier floor lamp . It was just one long strip of cloth and so there wasn't much left to do anything big. We didn't want to throw it off either and so we decided to use whatever that was available to convert our wall lamp into something colorful. So, here's what we did - A quickfire, 15 minute DIY.

DIY lamp shade, wall lap using fabric
DIY - Fabric Wall Lamp / Lamp Shade
  1. The wall fitting we zeroed in was just perfect for our need. It was square and was made of glass
  2. We unscrewed the glass fitting from the wall, and decided to merely cover it with the fabric.
  3. We cut the fabric to the required dimension, stretched and glued it onto the sides
Use fabric to make a DIY wall lamp
Fabric Lamp Shade
This is how it looked after we put the fitting back into its place.  Another DIY right in the entrance and we so love it. :)


P.S. Linking this post to Colours Dekor
- Somu


Custom made and sold.  We let the user pick the fabric herself and she chose an off white and beige striped jute fabric – Something that is neutral and can be used in any room irrespective of the room’s color theme. This was built to be used as a corner lamp (placed on the side table) in the drawing room of her new home.
Table lamp or bedside lamp using jute
Bedside Lamp
The base and the shade were made as separate units. Makes it easily portable and also enables her to mix and match the shade just in case a different colored one is sought in the future. This time around, we also managed to conceal the wire. Loved the way it had come out. Packed and sent !!!

Did you like this post ? Enter your E-mail address and join our growing E-mail list

You may also be interested in


When we decided to do away with some of the old clothes, we thought we could put one of my old kurtas to good use... And thus began our first experiment with lamp shades.
making a lamp shade using old fabric / kurta
DIY Fabric Lamp Shade
Incidentally this is the first shade that we ever made... and was quite a learning experience. We used flat sticks to build the frame... and because it was flat, the shade looks a little odd from the side. While we have moved on and started using sticks that look the same on all the sides, this one still remains special. We are still wondering whether to use it with a lamp stand, or plant it on the wall, or hang it in the room :)

It was only after this that we started exploring shades using fabric... The rich color and the ethnicity that they exude when lit is quite interesting. Just the perfect option when we needed to match the shade with the rest of the living room accessories.

So, what do you think ? Leave us your feedback.

You may also be interested in


We decided to build the whole package this time... the shade and the lamp base. 

The lampshade frame was made with wooden sticks as in the earlier cases.The lamp base was also made with wooden sticks nailed together. We went with straight cuts and a very simple design. The base was sanded, primed,painted (an undercoat and a top coat) and varnished for durability. Loved the way it turned out.
Using handmade paper for making bedside lamp shade
Bedside Lamp Shade  /
Hand Made paper shade

 For the shade, we chose handmade paper.We gave the shades of red a break and went with Magenta.. Need to conceal the wires next time around :)
- Somu


DIY lampshade using fabric
Fabric lamp shade
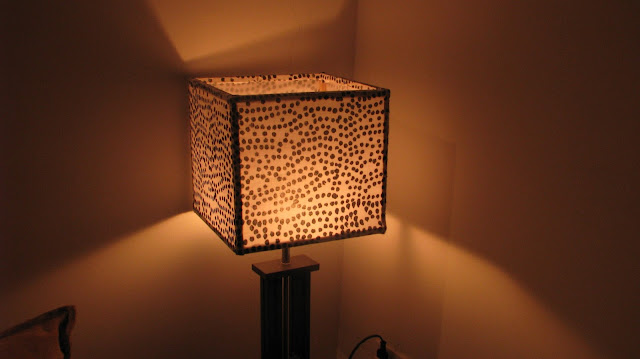
Made for a friend. She needed just a lamp shade. She already had a lamp stand for it. The only requirement was that it needs to match the drawing room accessories, and particularly the zebra striped sofa cushion. Rather, she just wanted something in black and white.                          

The frame was made using the wooden sticks nailed together and an inner layer of tracing sheet was glued to the frame. For the fabric, we spent sometime shopping until we found the one that we liked. Instead of going for the stripes, we decided to go for the spots. And the result was quite satisfying.
Pin It
Did you like this post ? Enter your E-mail address and join our growing E-mail list


If you liked this lamp shade, you may also be interested in our other DIY shades

- Somu


This one was interesting. Because we were making the floor lamp for someone else. And because they were paying for it. So, officially this was our first sale
.
And so extra care went into the making of it. We decided to have the base and the shade made separately, unlike the earlier one which was one single piece. The reason for it was a) to try something different this time and b) having the base separately enables easier replacement of bulbs.

DIY floor lamp,lamp shade
Floor lamp / Lamp Shade
Again, we used the wooded sticks for making the frame of the shade all of which were nailed together. The base was made with wooden linings (Edge bandings) that one normally uses for covering the exposed edges of plywood. They are about 3/4th of an inch wide, and less than 4mm thick. The base was built by sticking the wooden linings together using fevibond.

The cotton fabric was matched with the requirement of the buyer and a tracing sheet was used as the inner layer. The use of the tracing sheet is two fold : 1) Prevents the transfer of heat from the bulb directly to the fabric and 2) Does not expose the light directly to the eyes and hence enhances the look of the fabric when lit
- Somu

Know more about us

About Us
Reviews
Media
Our showroom location
Return and refund policy
Review us on Google

Connect with us


Mail us
Subscribe to our newsletter

Our Address :
Woodooz Home Decors,
3/371, First floor,
Metukuppam, Thoraipakkam,
Old Mahabalipuram Road (OMR),
Chennai - 600097.
Ph : +91 9884070470
Email : contact@woodooz.com
Created By SoraTemplates & MyBloggerThemes