Category : recycle idea


Not much is really happening with DIY or woodworking. Too many things have happened, life has taken a 180 degree turn and all in the positive direction. As cliched as it may sound, sometimes we wish a day had more than 24 hours. The project that I last started is in its almost complete state for more than 3 months now. It is only the last mile that I need to complete and yet, it remains unfinished. My hands itch at times hoping that I get to do something, however small it might be.


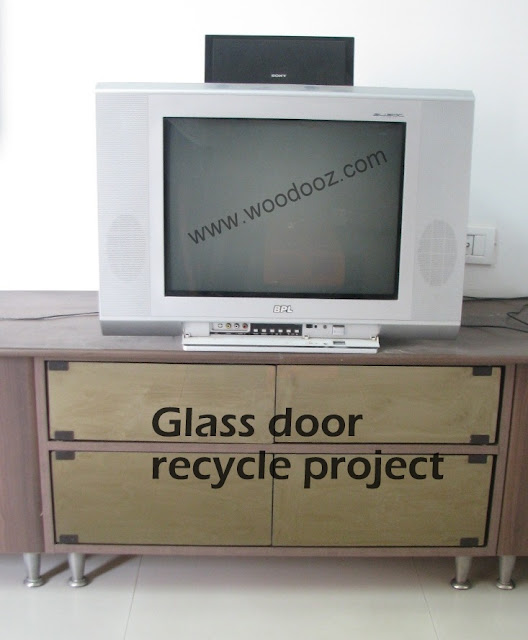
Anyway. Remember the glass door that we installed for our TV unit. There was a major draw back to it that I never foresaw. Because it was not a see through glass (partial see through), I had to keep the door open every time I had to use the remote. While we put up with this for a long time, we decided to do away with the translucent glass door and replace it with clear glass.
Recycling tip
Recycling project 
One glitch though.  What do we do with the already existing partial see through glasses. It would really break my heart to just throw them away after having spent some bucks on them. And just when this thought was running through my mind, a situation presented itself that gave me just the right opportunity to reuse these glass doors. And voila ! Without having to spend a single penny (except of course for the hinges which cost about 40 a pair) we had the glass doors converted into bathroom accessory stands / shelves.

Bathroom stand
Recycled glass - Serving as a bathroom accessory stand
The smaller glasses were just perfect and didn’t require any cut. The bigger ones were cut into 4 quarter circles and used as corner stands. All I did was I gave the directions to my plywood vendor and he had them all cut for me. He also smoothened the edges. I needed 12 hinges to have them installed on the wall and had the electrician install the once-a-door-now-a-shelf for me (While I normally do my installations, I have never tried drilling into a bathroom tile. I am also scared that I might puncture the concealed pipes. So just this, I leave it to the professionals).

Please ignore the not so perfect quarter circles
Corner shelf for bathroom
Corner shelves recycled from glass door
End of the day, it made two happy owners and possibly two happy tenants too.


This pickle jar that was given to me recently comes with a lot of legacy. It comes from my Mother-in-Law's collection of traditional pickle containers otherwise known as Jaadi in Tamil. So in a sense, it is special to both of us and gave me enough reasons to preserve it well and right.
Pickle Jar
Pickle Jar
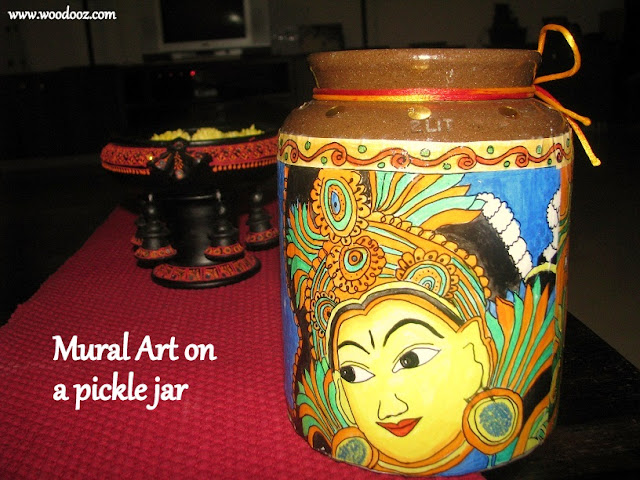
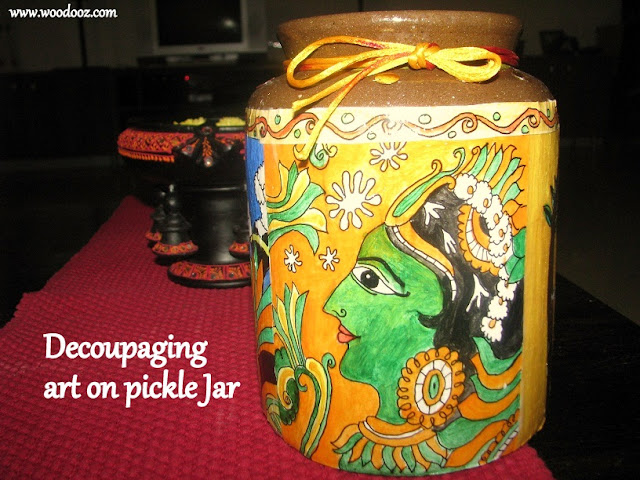
Not wanting to let it store pickles and be stacked inside a cabinet, I decided to embellish it with traditional art and showcase it somewhere in the open. I have been wanting to learn Kerala style mural paintings and so used up this opportunity. I also settled for decoupaging on the jaadi.

To save me some time, I chose to reproduce sketches (duly credited at the bottom of this post) that were already available on the net and added my own choice of colors to the sketches.
Sketch
The sketch
Mural Painting - Work in Progress
Mural Painting and Decoupage - Work in Progress
The paintings themselves did not take much time which made it less time consuming to complete the entire work, though I did it in phases. Just as how Mod Podge is supposed to be used, I was very generous in smearing my paintings with the glue.

Mod Podge
Smearing the decoupage glue
I did not want to complicate it much and so left the top portion of the jar in its natural glory. When I tried decoupage on water colors for an earlier project, I had issues with smudging. This time I was careful enough to use acrylic paint to avoid any blotching.

Kerala Mural Painting
Mural Art on a Pickle Jar
Mural Keral style art
Jar embellished with Kerala Mural Painting
I should thank my sister-in-law for sending me a bottle of Mod Podge from Bangalore. Since I was able to source the decoupage glue, I did not have to resort to Somu’s cheap method of making his own Mod Podge.

I would love to try different styles of painting and your words of engouragement will certainly up my motivation levels. Do leave me a comment and let me know what you think of this work. It would mean a lot.  Also, enter you e-mail address below to subscribe to updates just so you do not miss out on our forthcoming blog posts.

Painting Credits :
I have been true to the sources from where I picked the paintings. If these are not the original sources, I would be happy to make the necessary corrections.

Linking in : Colours Dekor


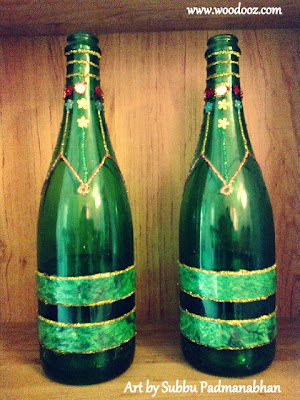
So far, Woodooz has always been about our works. We thought it is about time that we also use this platform to showcase arts and crafts by others, particularly those that do not have a blog to write about their work. In the recent days, we have been reaching out to talented friends and family and the first in this series of Woodooz Showcase is a DIY bottle art by my sister Subbu Padmanabhan.
Preethi and I have always been fascinated by wine bottle art, and so when we laid our eyes on these bottles during our last visit to Bangalore, we wanted to know how it was done.
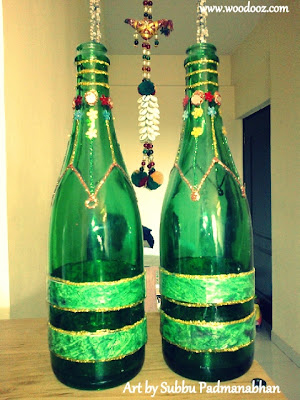
DIY Wine Bottle art
DIY Wine Bottle Art
Woodooz Showcase
               Art by Subbu Padmanabhan
So here it is, in her own words : 
"I wanted to keep it simple and so went for a minimalist design. The green wraps that you see in the bottom is handmade paper, bordered with glitters. I stuck the paper on to the bottle using cellotape."
Yeah, Cellotape. No fancy decoupage glue used. 
How to recycle wine bottles
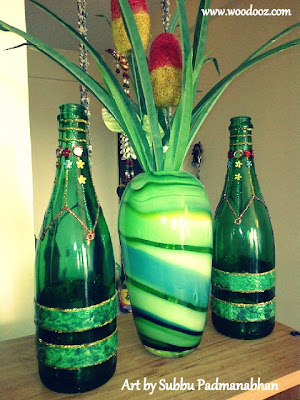
Wine Bottles - Recycled
"For the top, I again chose a simple design, and had it drawn lightly using a pencil. I filled up the line drawing with Fevicryl 3D glitters. I then completed the design by gluing sequins around the top of the bottle"
Wine bottle Craft ideas
Craft idea for your Wine bottles
"I left most of the surface area of the bottle blank, because the green backdrop was by itself enhancing the look.  And now this pair of bottles lay right where everyone can see them - In the living room."

So how did you like it ? Sometimes overcrowding can be an overkill, and we thought it is the simplicity of the design that makes it stand out. Leave your comments and let the artist know what you think of her work.
Another wine bottle idea that we loved : 
by Sarmistha Roy 

About the Artist
Subbu Padmanabhan is a mom to a 3 something year old boy, and works as faculty in a premier play school. She likes to indulge in mini crafts projects, for the school and her home, during her spare time. The wall art that you see in the backdrop of this bedside lamp is her handiwork too. She lives in Bangalore.

You may also like :

Linking in : Made with Love PartyColours Dekor
- Somu


When we decided to do away with some of the old clothes, we thought we could put one of my old kurtas to good use... And thus began our first experiment with lamp shades.
making a lamp shade using old fabric / kurta
DIY Fabric Lamp Shade
Incidentally this is the first shade that we ever made... and was quite a learning experience. We used flat sticks to build the frame... and because it was flat, the shade looks a little odd from the side. While we have moved on and started using sticks that look the same on all the sides, this one still remains special. We are still wondering whether to use it with a lamp stand, or plant it on the wall, or hang it in the room :)

It was only after this that we started exploring shades using fabric... The rich color and the ethnicity that they exude when lit is quite interesting. Just the perfect option when we needed to match the shade with the rest of the living room accessories.

So, what do you think ? Leave us your feedback.

You may also be interested in

Know more about us

About Us
Reviews
Media
Our showroom location
Return and refund policy
Review us on Google

Connect with us


Mail us
Subscribe to our newsletter

Our Address :
Woodooz Home Decors,
3/371, First floor,
Metukuppam, Thoraipakkam,
Old Mahabalipuram Road (OMR),
Chennai - 600097.
Ph : +91 9884070470
Email : contact@woodooz.com
Created By SoraTemplates & MyBloggerThemes