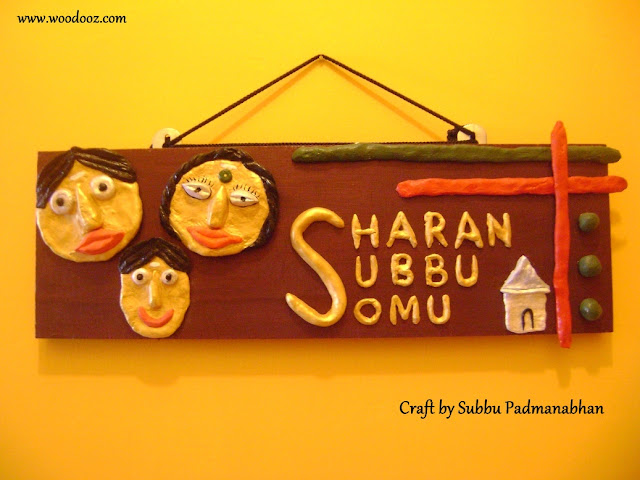
Second in our series of WOODOOZ SHOWCASE, we bring to you a craft project by Subbu Padmanabhan. We once did two tribal face masks and then a personalized name board using paper mache. Here’s a paper mache craft idea that combines the faces and the name plate into one beautiful welcome board for the entrance.
Read more to know what Subbu has to say about her project, in her own words.
"I had a spare wooden plank and lots of time during my son’s summer vacation and wanted to use them resourcefully. One of the many things I made was this name board for my home in Bangalore .
I wanted to make a home, faces to represent the occupants of the home and then our names. Making the paper mache paste is easy and you can find a detailed step by step description of how Preethi made the paper mache paste here in Woodooz. One additional thing I did was add chalk paste putty when I ran short of flour."
"The grey color is because of the water in the mix. Once the figures are made, they need to be allowed to dry for a minimum of 24 hours before you can do anything with it. Once dried, it takes a lighter color with all the water drained off. I made the letters separately and then set it on the plank."
"Once I was happy with the arrangement, I set out to color the faces and the letters. I used acrylic colors to give the entire project some life."
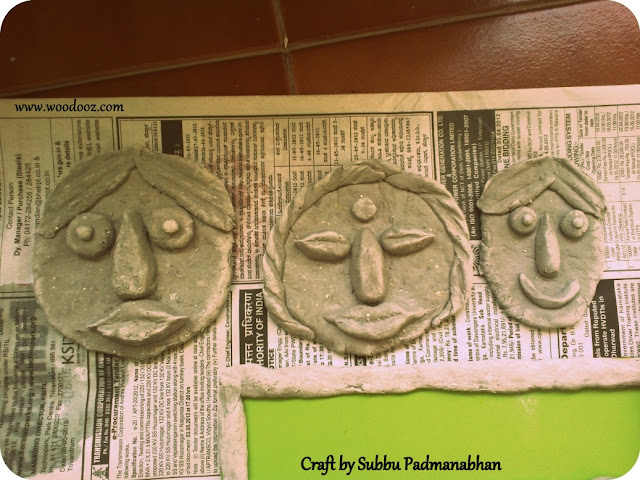 |
| Paper Mache faces |
"The grey color is because of the water in the mix. Once the figures are made, they need to be allowed to dry for a minimum of 24 hours before you can do anything with it. Once dried, it takes a lighter color with all the water drained off. I made the letters separately and then set it on the plank."
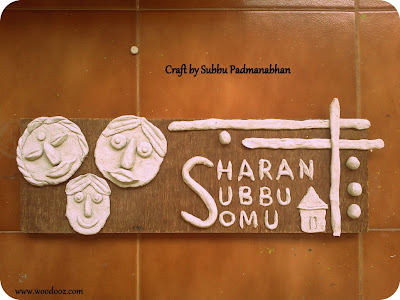 |
| Arranged to be glued |
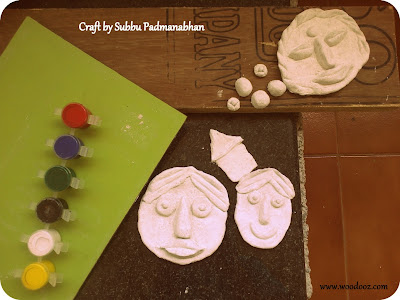 |
| Acrylic colors for painting |
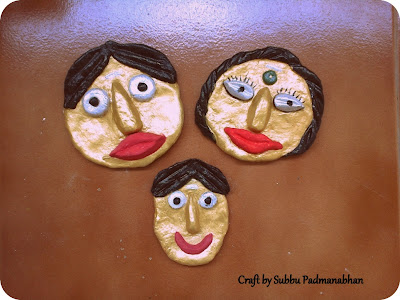 |
| Paper mache faces painted |
 |
| DIY Paper Mache Craft |
By the way, her friends in the apartment loved the name plate so much that one of them wanted to learn how it was made and another wanted to custom make a plate similar to this one. Isn’t that wonderful ?
About the Artist
Subbu Padmanabhan is a mom to a 3 something year old boy, and works as faculty in a premier play school. She likes to indulge in mini crafts projects, for the school and her home, during her spare time. The wall art that you see in the backdrop of this bedside lamp is her handiwork too. She lives in Bangalore.
You may also be interested in
- Somu


very nice & creative...inspired me to do one for my home...
ReplyDeleteHi Gomathi, thanks for dropping in and leaving a comment :) Glad it could be an inspiration. We sure would love to see your name board once you are done with it :)
DeleteI am 100 % inspired..want to make one too..hope its O.K to get back to you If I get stuck :)
ReplyDeleteWe are 100% honored :) You certainly can come back. We would love to help you with it. Infact we have been wanting to make a detailed post on how we made the paper mache paste... Hopefully it should be up soon and should be of some help.
DeleteWahhhhhhh...lththukkal
ReplyDeleteNandri :)
DeleteThis is such a cute name board. Loved it completely!!
ReplyDeleteHi Disha, thanks :) Glad you loved it.
Deletelovely..... very nice idea
ReplyDeleteThanks Aruljothi, and welcome back. You seem to have been missing here for sometime :)
Deletefabulous craft out of paper mache.congrats subbu,
ReplyDelete:) Thanks. Shall make sure Subbu gets the message.
DeleteVery good creative work. Great balance in the composition. I really like the tone of the background wood. Perhaps the top green line should have been the same color as the bottom one to give it a unified feel. Possibly you could also play around with the color of the lettering(maybe green)to give balance to the composition it might make the faces more prominent. Of course this is my view Im not a very creative with colors though.
ReplyDeleteThanks Kittu. Yeah, the unified feel could have made up for a different look. Playing around with the color is also a good option. It would certainly give the board a really bold look. Your view is perfectly justified as experiments with colors can surely bring out a new feel to the end result.
DeleteLovely nameplate made by Subbu :)..Thank u Somu for uploading info about paper mache..I have asked for it to u sometime back :) I want to try making of fridge magnets made up of paper mache..let us see how much I could do with it
ReplyDeleteAparna, thanks a lot. We have been wanting to put a detailed post on the paper mache paste. But not really finding the weekend time to do so. We have it in the top of out minds and want to put it up sooner. Meanwhile, if you think the details available is not enough for your magnets, let me know. Will be happy to provide more inputs offline. Am assuming your paper mache magnets will have something to do with Warli. Will look forward to it.
DeleteHi.. I generally make stuff with paper mache [layered method] and not much with paper pulp. I just wanted to know whether paper pulp could be filled in a cone, and used to "write" out the letters or "draw" some designs??
ReplyDeletevery nice & creative
ReplyDeleteThis comment has been removed by a blog administrator.
ReplyDeleteBeautifully done - especially the tribal face masks. However, I think paper mache isn't the right craft for the lettering bit. I make nameplates and retail them at http://engrave.in/products/name-plates and have been trying my hands at paper mache for a new range of products but lettering never turns out neat. Perhaps, lettering using conework may go well with this.
ReplyDeleteWe have sell some products of different custom boxes.it is very useful and very low price please visits this site thanks and please share this post with your friends. essay help
ReplyDeleteHighly impressive and imaginative:)
ReplyDeleteThanks for sharing this type of informative article. I have learned some right stuff here. I really like your articles.
ReplyDelete